As winter approached, I began an experiment that has been in the back of my mind for a year or so - hydroponic strawberries! Various online sources, mainly youtube videos, indicated it was very possible to produce strawberries throughout the year using an NFT system, with consistently good results.
The starting point was to buy a set of strawberry “crowns“ from a standard online garden retailer - these are basically nearly dried out clumps of roots with the old foliage and stems dried up and mostly trimmed back. These were rehydrated by soaking for several hours, and dropped into the freshly cleaned NFT system with just water running initially. After another day or so I began adding nutrient to a very weak level, and left this running for a few days until the first signs of life began to appear, with the green hints of new leaves.

Hydrogardening


Micro Tomato Experiment
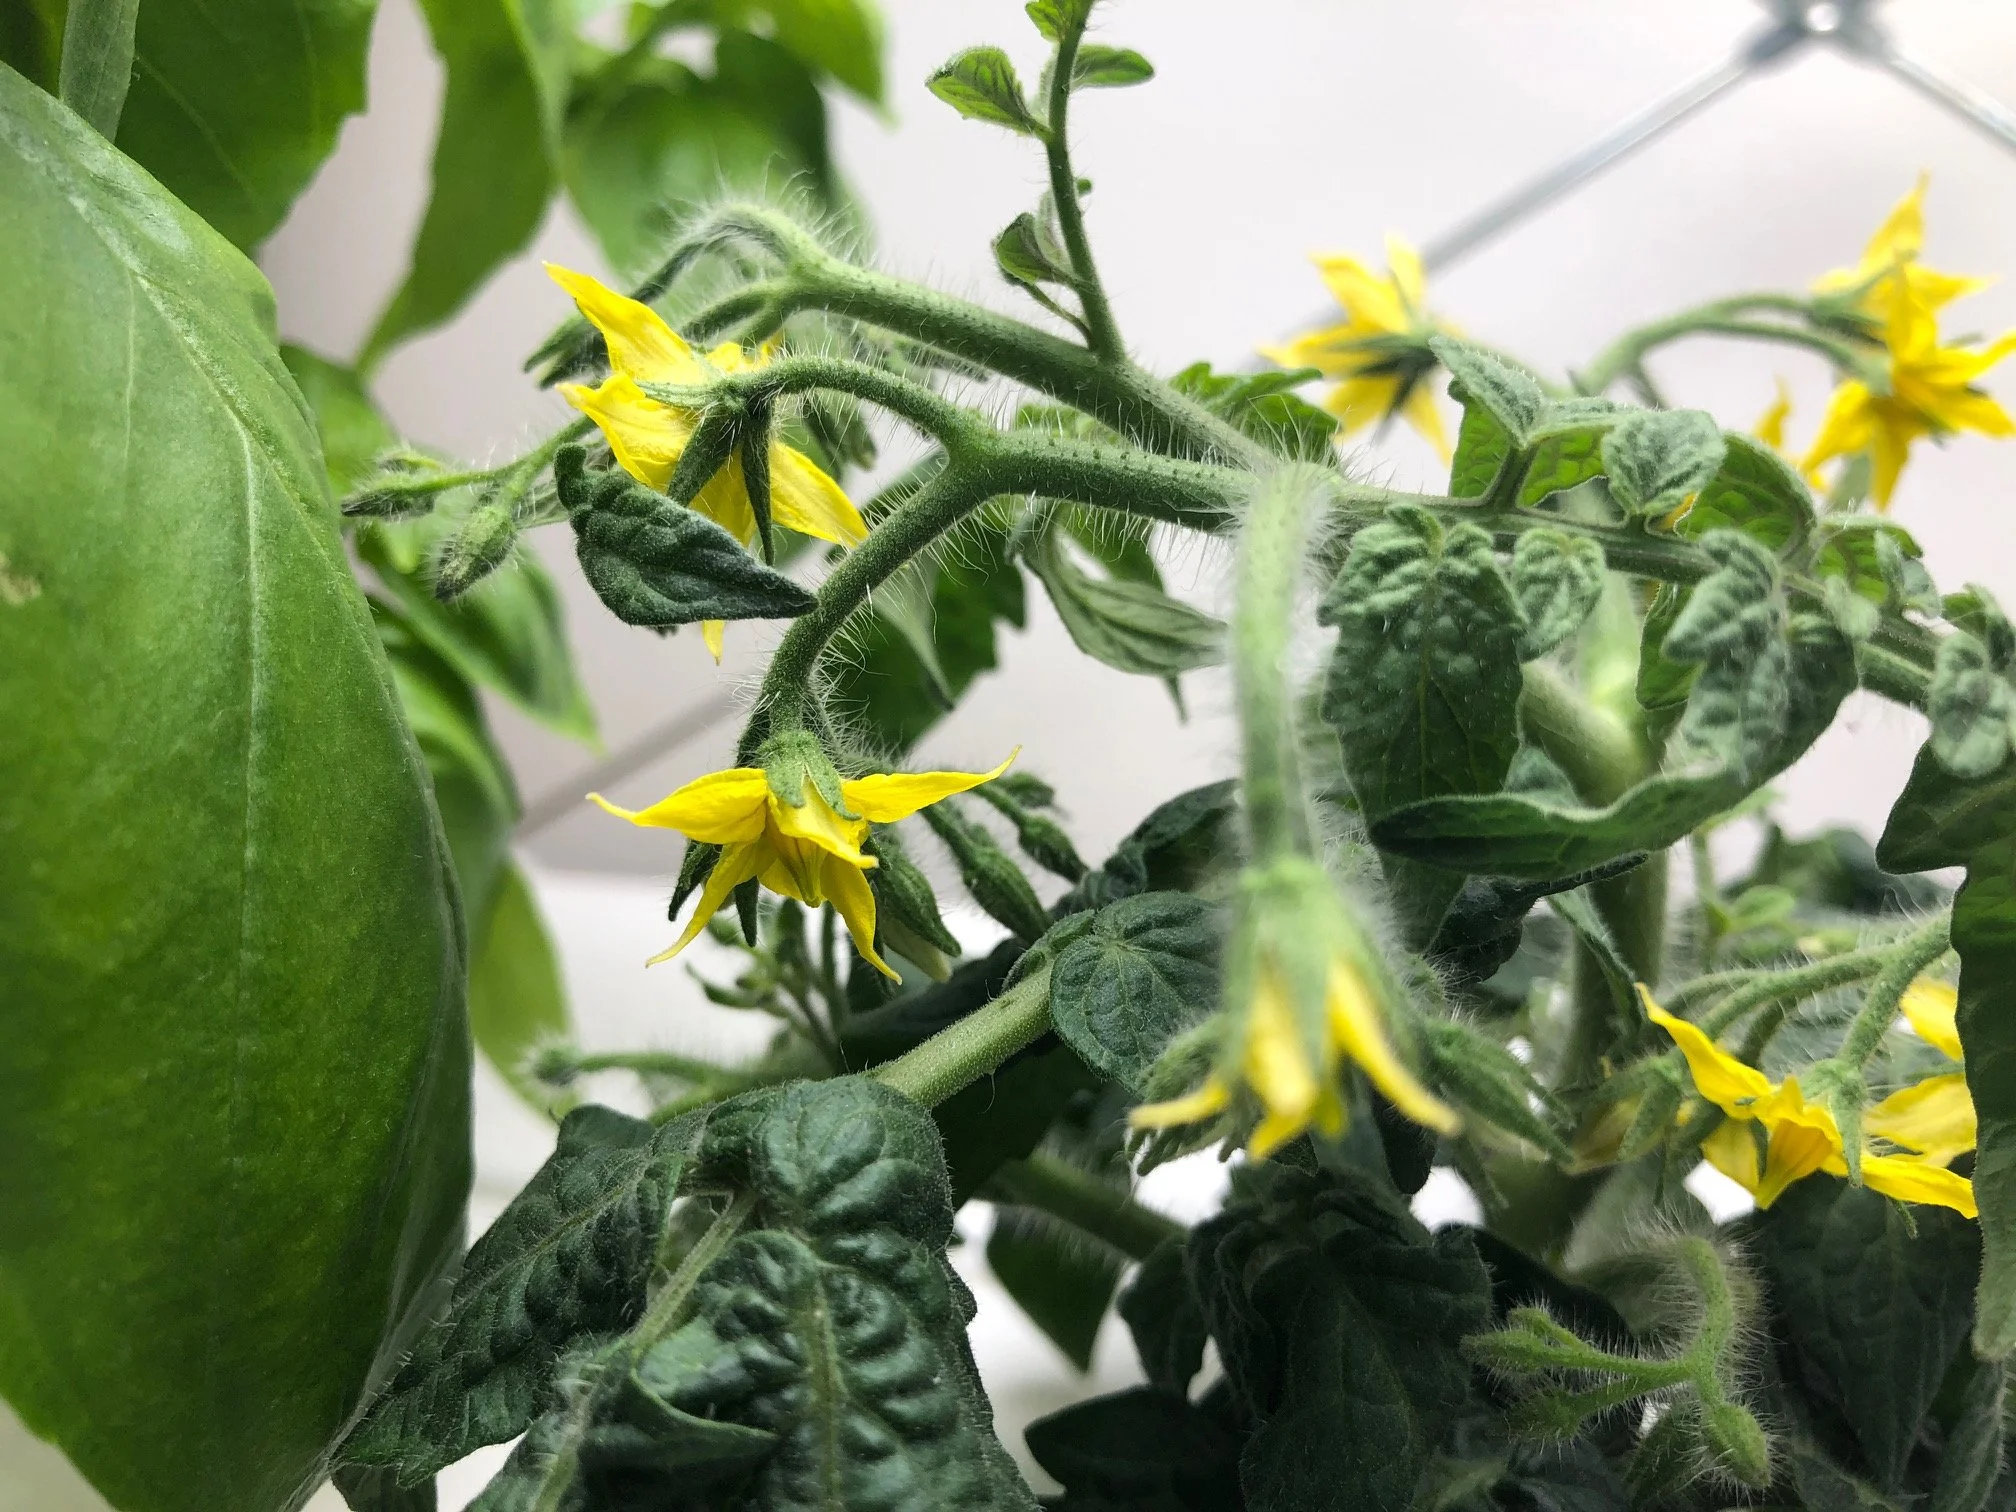
There has been a lot of change in the hydroponics system over the last few months, with some problems that needed resolving or working around, and some fairly uninspiring experiments. At the moment, I have some very nice basil (which seems very easy to grow reliably) and some more experiments in the form of two Micro Tom tomato plants which are now in flower. They really are even more “micro” than i was expecting, but the larger of the two (more directly under the centre of the light) looks vert healthy. The height of the larger one (pictured above) is just less than 15cm, which is actually what is advertised on the packet. The smaller one which looks a bit stunted even for a dwarf variety, is less than 8cm tall at this point, though it also looks fairly healthy and has a fair few flowers.
The problems that I had were after I took the system apart for a “deep clean” which ended up taking quite a few weeks to complete, with all of the other things happening in life at the same time. Putting the system together again after that, I found that the expensive Atlas Scientific pH sensor no longer worked properly, though rather than being flat-out broken, it instead gave bad readings and I was unable to calibrate it to give sensible results. I don’t understand the cause of this - although I didn’t store the probe tip in proper storage solution as I should have, I stored it in water, thinking it would be less than a week before it was back in operation. The probe is meant to be able to last for years in liquids of all sorts of pH levels, so I cannot think that this alone was the cause. Anyway I spend many many hours trying to get it to work and in the end just bought a cheap standalone pH sensor and display which has worked beautifully since I got it. It is a shame I can no longer get access to the data to log it and display online in my in-progress new website that i’m building, but I will come back to it when I have the time. For now, the system is back and working reliably.
I also had some issues with leakage after the cleaning process, which I have mostly corrected but really needs a proper dismantling to address fully. Since i’m due to be moving home in the next 6 weeks, and everything will have to come apart for that, I will tackle it down the line - it is currently very minor so not quite bad enough to catalyse a total dismantling!
The other thing worth mentioning is that due to increasing energy costs, I have again reverted to a very simple system with just a single “layer” under a single LED light panel. So experiments have been on a much more modest scale recently. A couple of months of coriander-only experiments led to some decent results, but they were not as reliably good as I want to achieve. This was at least partly due to the problems I was having with maintaining a reliable pH during the young stages of the plants, so I will try again when the system is once again set up in the new home.
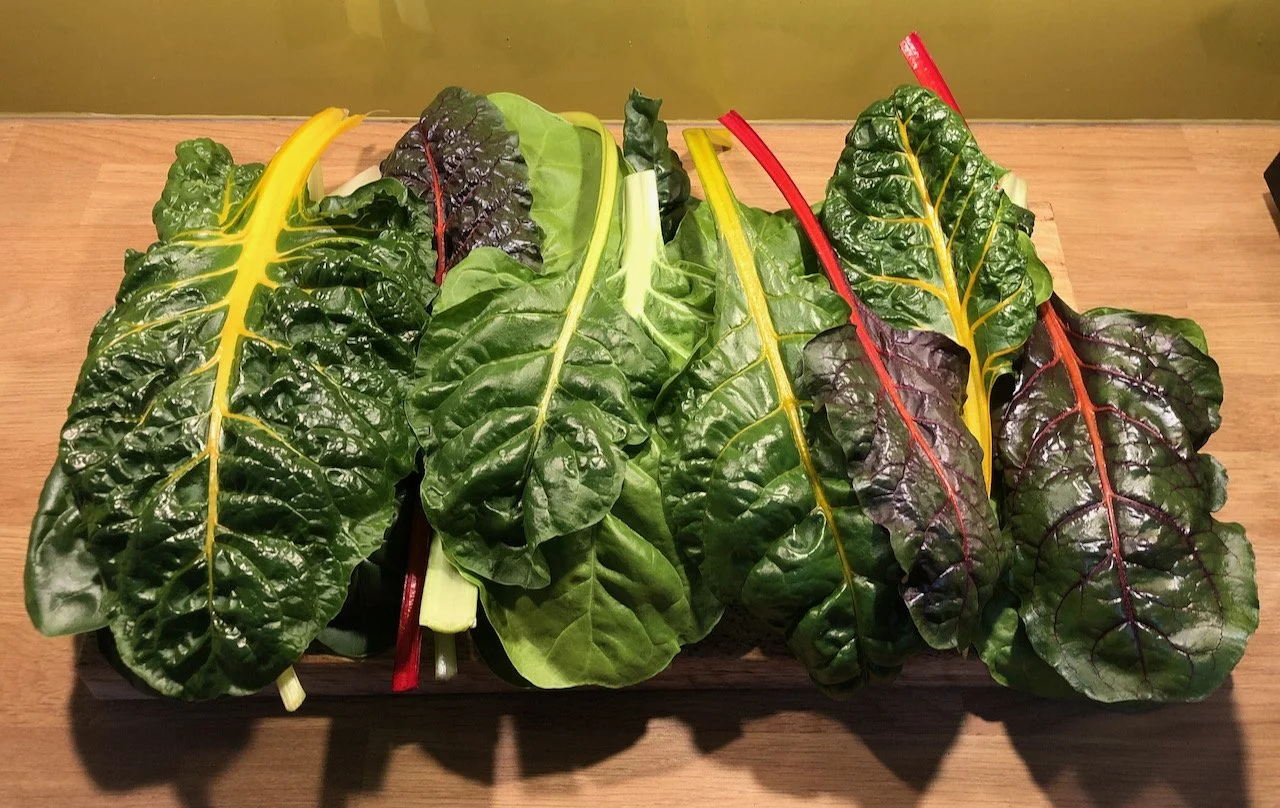
400 grams of hydroponically grown Swiss chard
Chard
I recently harvested about half of the currently available rainbow chard to make a curry. These leaves are really beautiful things to my eye! So healthy and vibrant, it was a real shame to cut these leaves off, though the plants that produces them are still going strong…. The curry was great too.
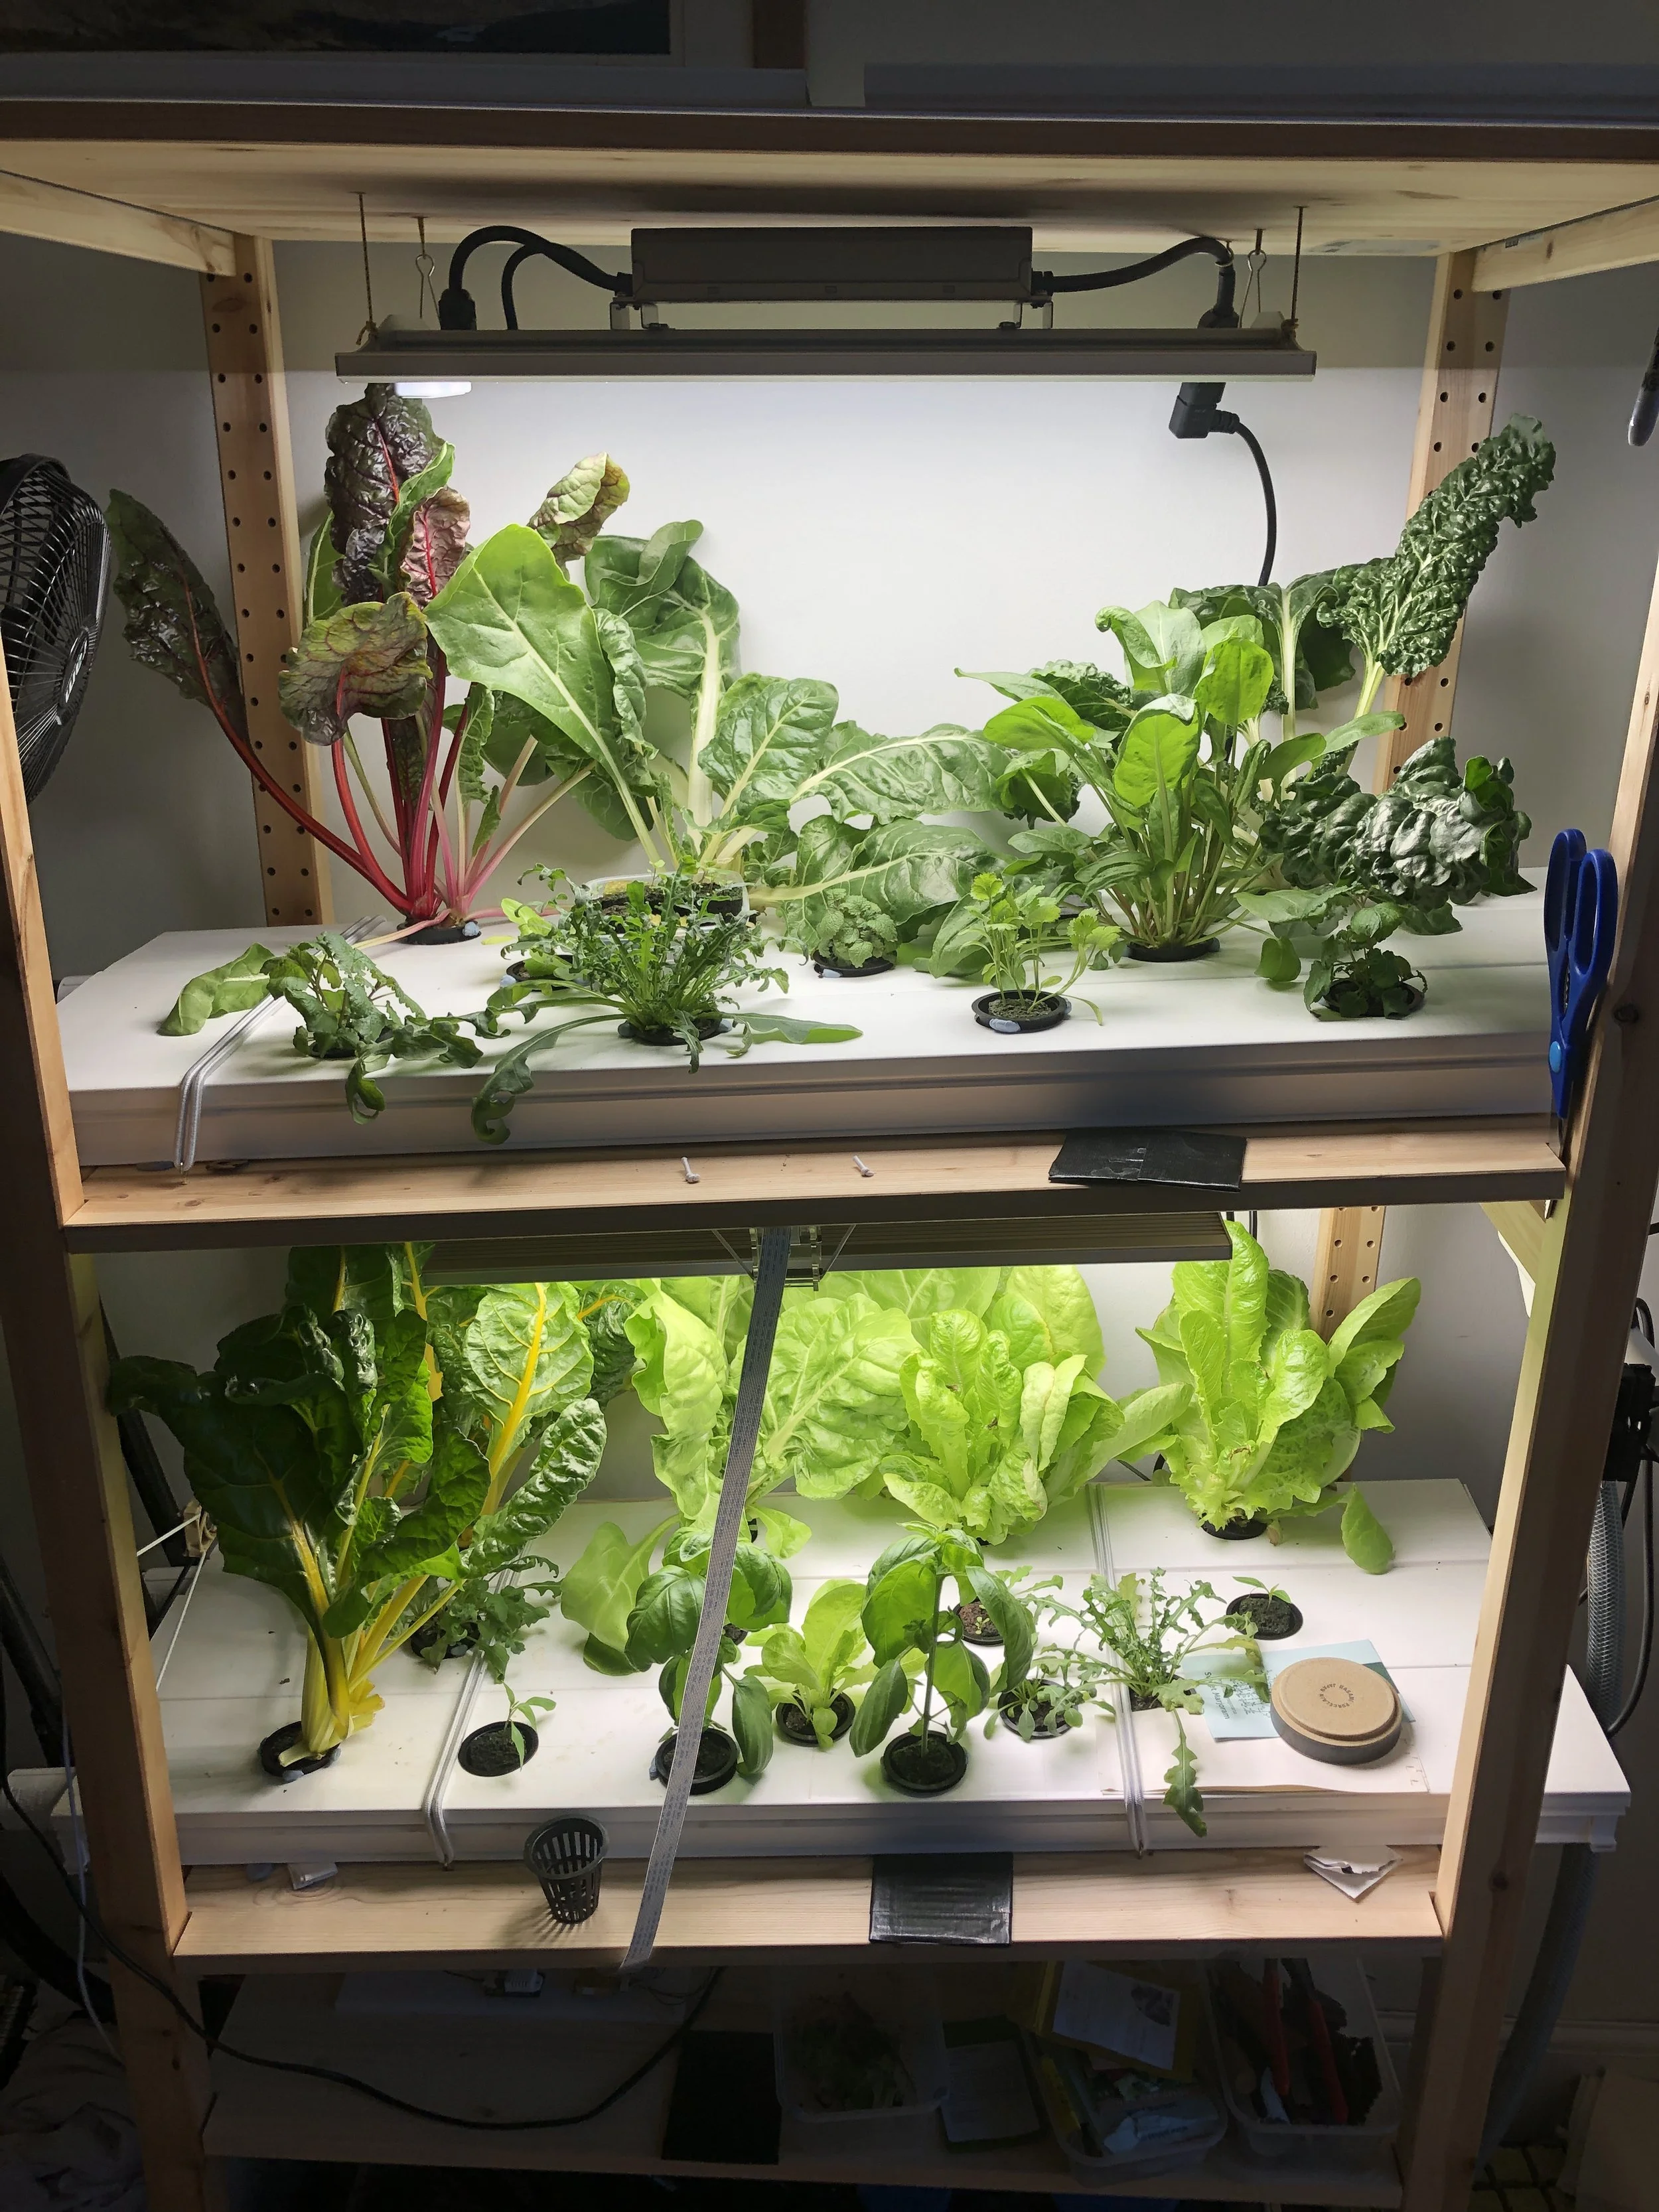
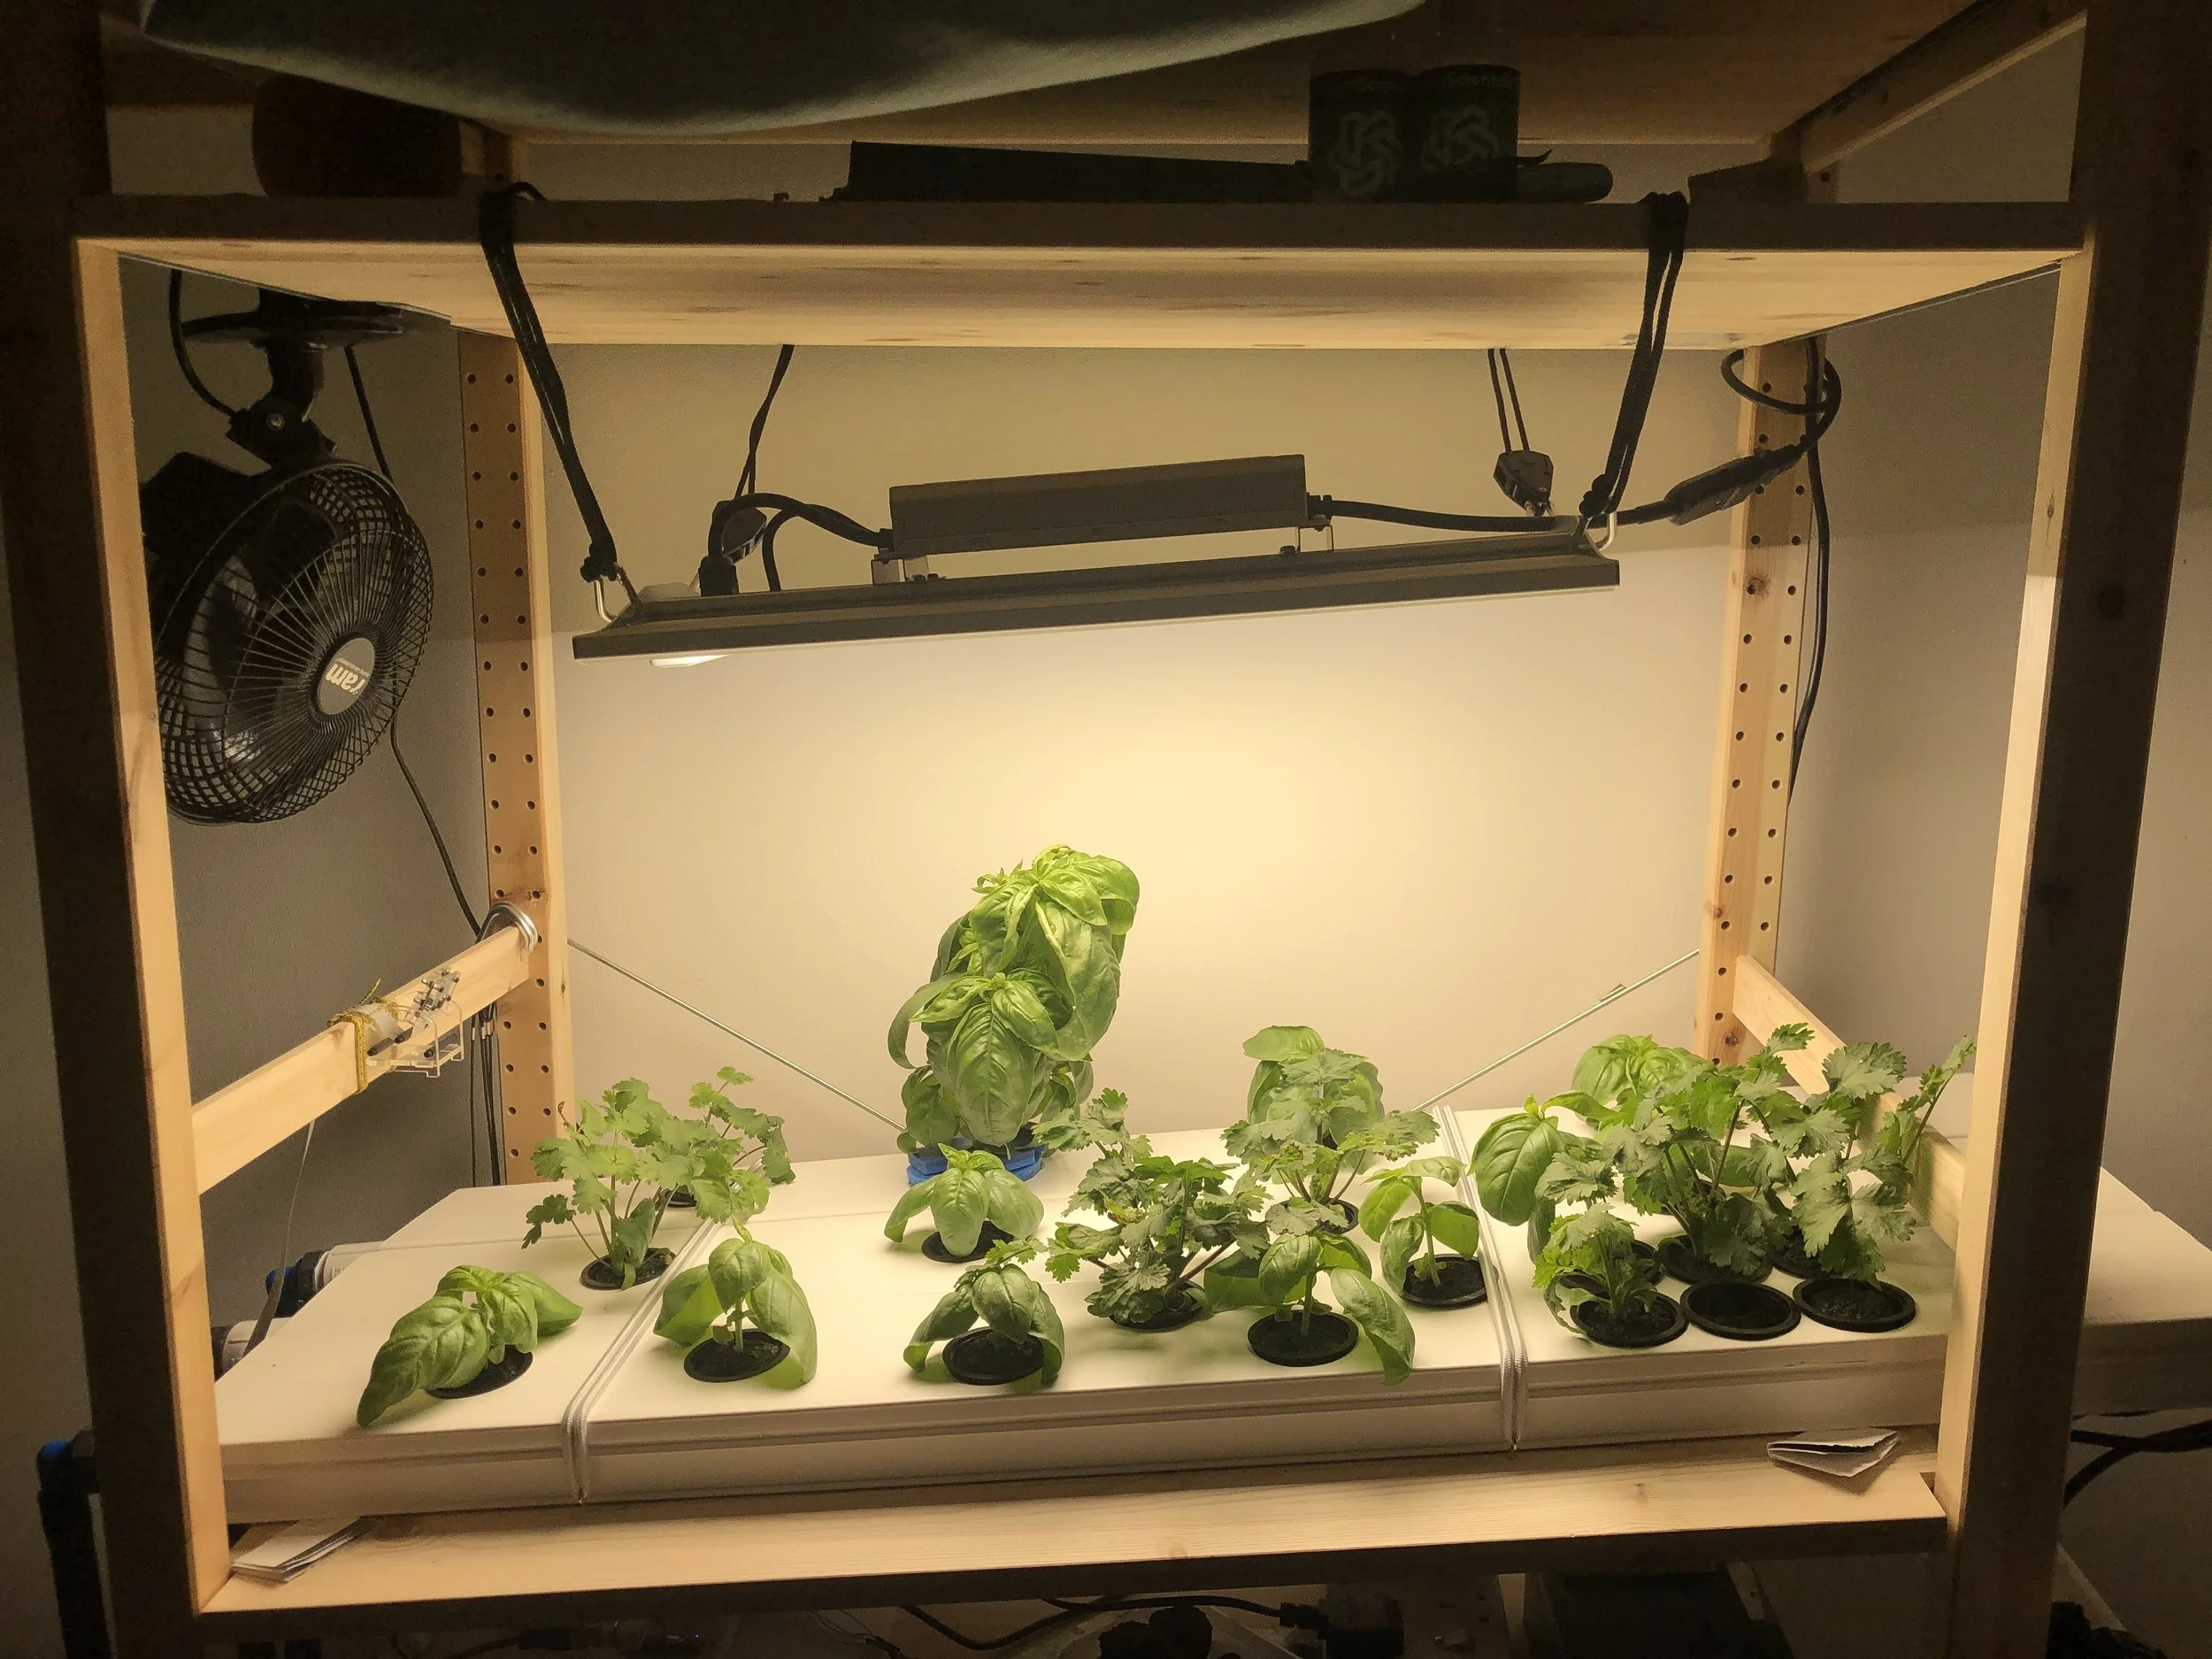
An eclectic selection of plants under test at the moment…. This picture was taken just after harvesting the chard shown above. The basil is now growing really quickly, though the rocket is not looking very happy at all - needs investigation!
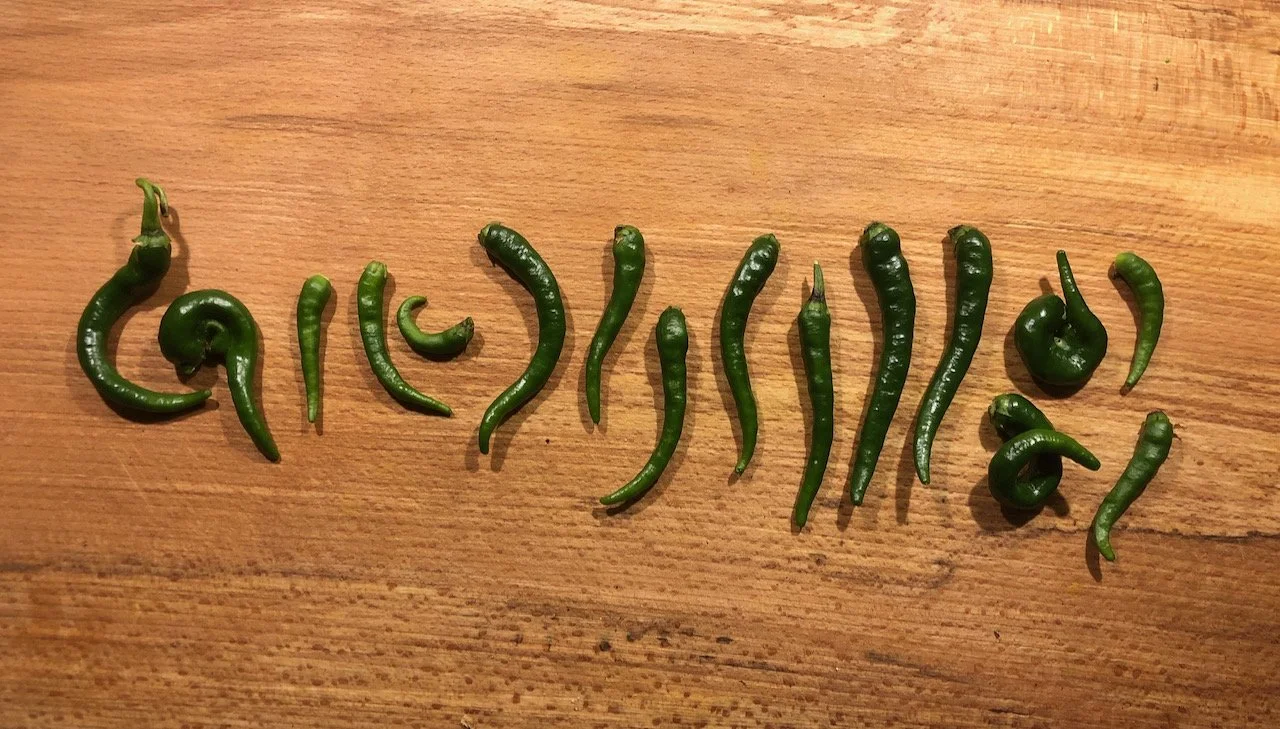
Chillies
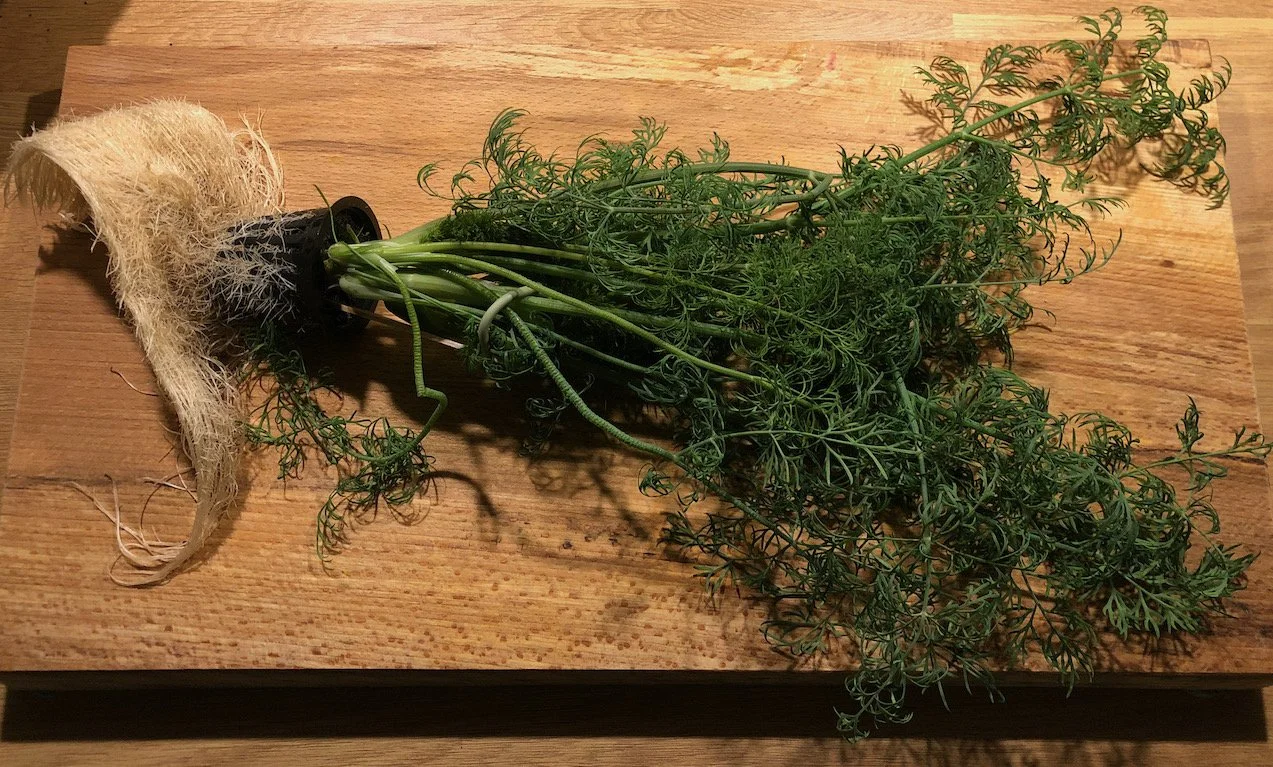
Dill plant
Dill
I have experimented in recent weeks with growing dill. The end result has been more dill than I have been able to either use or give away fast enough - but this was after a fairly slow start. The dill seedlings were very weak and pathetic for some time, with most unable to support their own weight. I ended up using padded wire on it’s own or attached to small wooden stakes to support them whilst they grew. I am not yet clear on all the reasons for this weakness. I think dill is somewhat notorious for this sort of problem, but nevertheless I should be able to provide suitable conditions for seedlings to grow to support heir own weight. I think the use of a fan to try and encourage the plants to strengthen did some good. More trials will be required to get to the bottom of it though.
I also learned some lessons about scheduling of plants and have begun to take a more systematic approach to planting new seeds each week, based on an estimate of what I might like to consume in 1 week. This is of course complicated by the fact that different crops take different amounts of time to come to maturity, and the fact that the more variety of plants I have, the more difficult it could be to assess and refine a growth recipe for any one of the species. However, this is essentially a practical project to try to supply much of my leafy greens and herbs for my diet, and so a variety of plants based on what I want to eat is the priority, rather than maximising yields of individual crops, as would be the case in a commercial setting.
At the moment I have rainbow chard, Jericho lettuce, rocket, lemon balm, coriander, and sweet marjoram in the system, along with the over-abundance of dill. Everything seems to be growing well despite the “compromise” conditions, with the exception of the coriander - I am still having tip burn problems, this time with inner tip burn only. It is a little odd that all the other plants do well when only coriander is suffering, so I will be delighted to get to the bottom of this one eventually!


Before
Pesto
Having focussed so far on just trying to grow herbs in some quantity, without spending much time on scheduling according to weekly needs, I recently found myself with a lot of basil. The obvious thing to do was to make a lot of pesto, eat a lot of pesto, and give the excess away to friends. Having made three large batches I now think i’ve improved my pesto-making skills to a satisfactory point, but I think there will be many more opportunities to practice given how well basil grows in this system.

After

First Grow Timelapse
This is the result of my first timelapse effort, in an attempt to document the first real grow in the system. The quality leaves something to be desired, but it does give some feel for how the plants grew. You may be able to spot the coriander looking less than ideal; an issue I have documented a bit below. Changes that I introduced after the first grow look to have improved the conditions for growing sensitive herbs like coriander.
I will briefly note the main changes here. The light schedule was shifted from 7am - 10pm to 8am to 8pm, reducing the number of light-on hours from 15 to 12. I also reduced the intensity of the lighting from positions in the range 50-75% (I was fiddling with this and adjusting it, probably more than I should have), down to around 30%. I have been manually turning on the fan for relatively short periods to get some air moving through the plants, particularly if I have noticed any buildup of water underneath the leaves, which happened occasionally on the basil plants. Finally, I added a “mycorhizal” supplement to the nutrient solution, after noting some browning of some of the roots, and also a white fungus growing on the outside of all of the root riot plugs that I am using as the support medium at the moment.
Again - I have not really followed a proper version of the scientific method, having changed multiple things at once. However, the overall effect has been very much in a positive direction. My current grow is focussing on coriander and dill, two relatively delicate herbs that will require careful management of the conditions to get good quality growth. This should be another good test of the current set-up and hopefully I will be able to make further improvements… :)
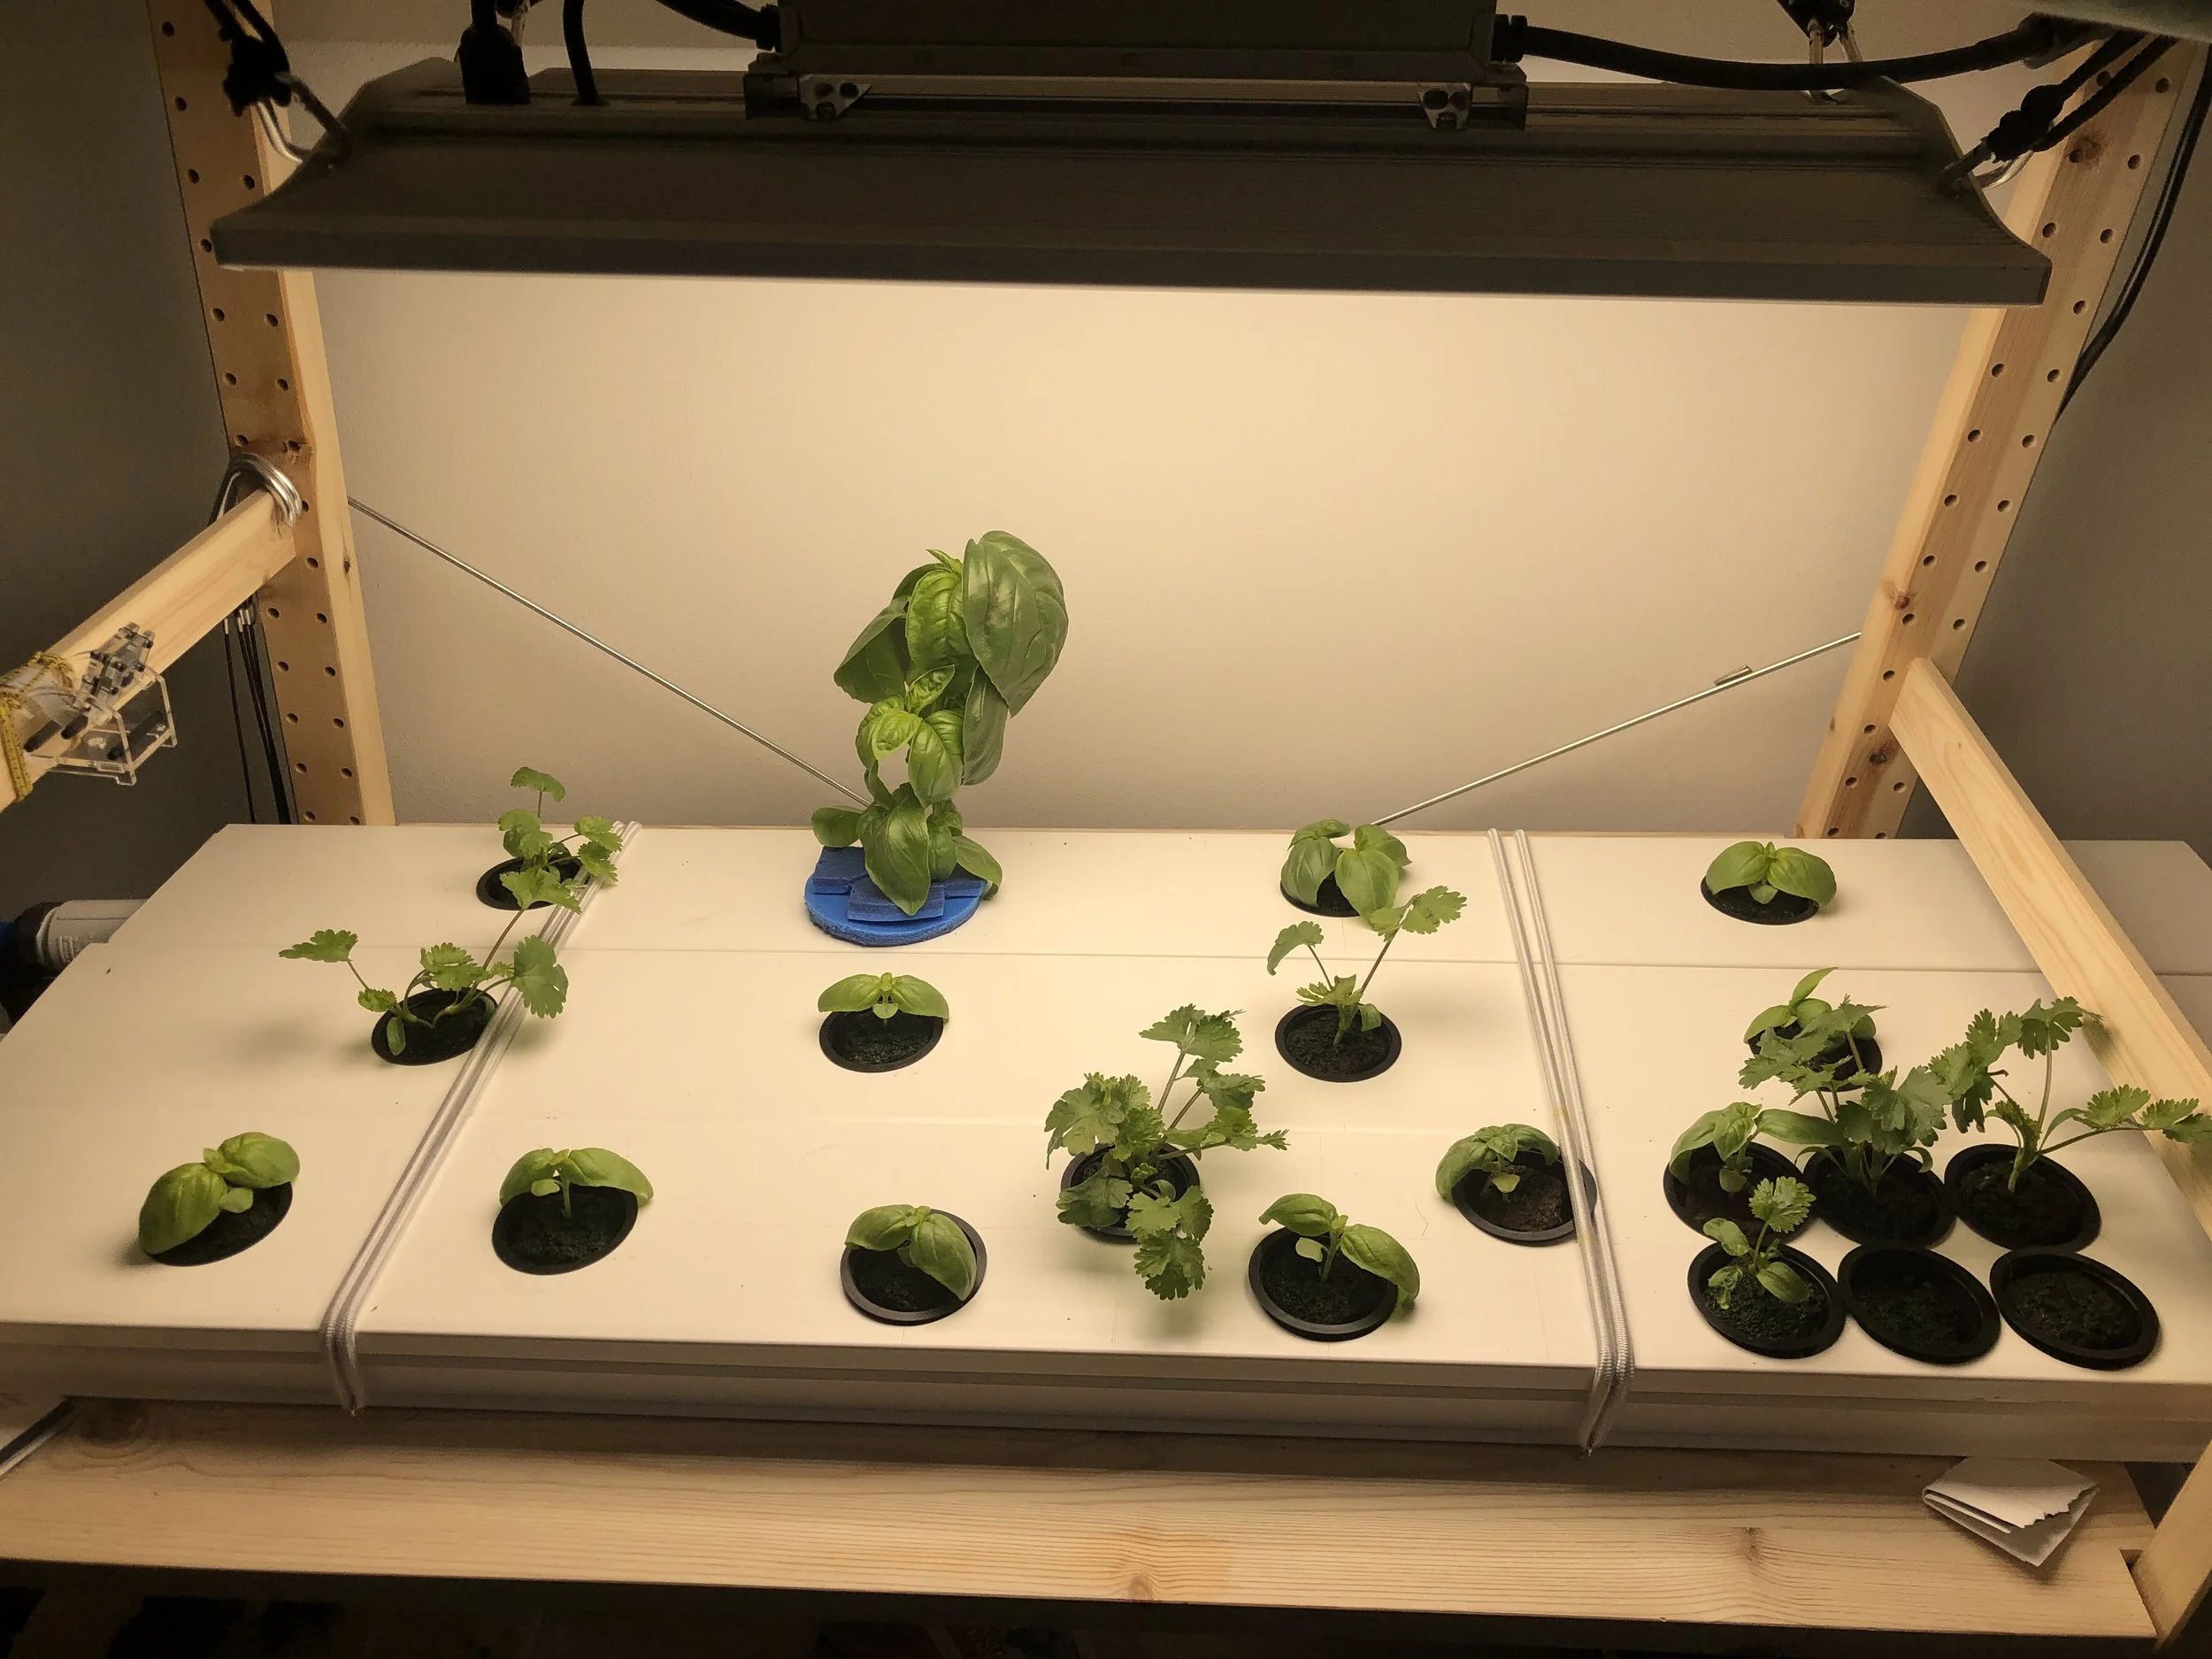
Good Basil Growth, Some Coriander Tip Burn
The current coriander and basil grow has been going quite well and the plants are well established, with a lot of healthy roots trailing along the bottom of the NFT channels.
However, the coriander started showing a few signs of tip burn (both inner and outer) in the last week, and so I have been trying to address this. EC and pH levels are firmly in the range of recommended values for coriander, so unless my data is wrong or the sensors are reading incorrectly, I think i can discount those as factors. My initial research suggests that the problem may be caused by calcium deficiency which could in turn be caused by a sub-optimal rate of transpiration from the plant leaves. To try and help solve this I added the fan you can see in the top left of the above photo, which I am having on for a few hours a day so see if this encourages greater rates of transpiration as fresh and drier air is constantly blowing over the plants. It will be helpful to automate this and perhaps have a smaller fan to gently get a current of air moving through the plants without using too much excess energy, though more research is required to get the right setup. I am currently not controlling humidity at all within the growing area, which is another area it may be beneficial to address in future.
The other tack I have taken is to reduce the intensity of the lighting. The LED light I have has a dimmer that allows, but it is a bit of an inexact science at the moment regarding light exposure rates and times, so I may end up getting a PAR (photosynthetically active radiation) sensor to measure how much light is falling on the various parts of the system, and adjusting these levels, plus the total number of hours of lighting per day, to achieve a more “debuggable” lighting set-up. The whole point of the other sensors is to be able to home in on an ideal set of conditions, so having such an important aspect as the lighting currently un-monitored is a bit of a hole in the system.
Hopefully the above changes will lead to a reduction in the tip burn in the coriander. The basil has not experienced any such problems, and growth is still strong. The basil grow may have it’s own slight issues but I will go more into that in a future post.

Example of coriander “tip burn”

Main dashboard displaying the key information about the nutrient solution and the room
Mycodo & Web Dashboard
I am indebted to Kyle Gabriel who has written Mycodo, the open source software described at https://github.com/kizniche/Mycodo. It is specifically written for interfacing sensors, pumps, and various other control systems together in a user friendly interface. It is designed to work on Raspberry Pi computers - I have a Pi 4 for this project.
It was pretty easy to set up. The main “difficulties” encountered were not really difficulties but rather the results of the author’s unfamiliarity with the components of the system, having not often worked with the Raspberry Pi or done much hobby electronics. However, most of the really clever stuff is done behind the scenes and it’s really just a case of plugging things together and configuring things carefully so that the various methods of communicating data between devices work properly.
In the current system, most of the devices (pH, EC, and temperature sensors, and the 4 dosing pumps) use the I2C communication protocol that allows multiple devices to be connected in parallel and still be addressed separately, and read / controlled independently by the system. All of these devices arrived set to use a different protocol (UART), and so had to be configured to change the protocol, a process that involved shorting out certain pins whilst powering the devices on. Once this was done, the devices could be wired up to the Raspberry Pi via breadboards and jumper wires with no real difficulties, even for a careful beginner.
The temperature / humidity sensor for the room was wired up to use the simple UART protocol, and the CO2 sensor data was connected into a GPIO pin (general purpose in/out) on the Pi.
The only other thing connected at the moment is a basic Pi camera which is set up to take a time lapse image every 2 hours. It is also very useful for keeping an eye on the system whilst I am not at home - i can take a still image at any time via the Mycodo dashboard, as I have set up port forwarding from my local wifi router such that I can connect to the raspberry pi via wifi by accessing my router’s public IP address from any web browser.
A final couple of additions I made allow me to control the system remotely. I bought two “smart” plugs that are linked to an Amazon account and can be switched on and off from anywhere with an internet connection. One provides power to the lights and water pump, and one powers the raspberry pi. This setup means that if i suspect a problem with the system whilst I am away from home, I can simply shut the whole thing down until I get back home to investigate further. I have the system set up to email me if the pH or EC goes out of the expected range, and I can check it whenever I want anyway, so I think it is a sound system for running even when I am not at home. This method of remote checking was tested over Christmas and I found it worked really well, though nothing actually went wrong that required a proper test…!
A final benefit of these smart plugs is that they can monitor the electrical power usage of the components that run from them. Notwithstanding the fact that the plugs themselves also consume some small amount of energy, I can use this information to help gauge the “eco credentials” of the whole idea, once I have run more experiments and had the system running for a few months.
I am somewhat worried that the power usage may be hard to justify with respect to simply buying the equivalent herbs in a supermarket, but this remains to be seen. I could switch my energy supplier to one which supplies renewable energy only, but this is still inefficient when compared with using direct sunlight. However, in my current flat, with limited space, in a dark Scottish winter, this is far from an easy way to run things…

Basil and coriander in the first attempt
Trials With The Automated System
Most of the main components are in place and working well in the automated system. After several careful trials pumping water through the system and fixing various leaks, I was able to let it run unsupervised without worrying that I would come back to a soaked floor.
Various sensors were added - for nutrient solution temperature, electrical conductivity (EC - a proxy for nutrient concentration), and pH. For the room I added sensors for air temperature, humidity, and carbon dioxide concentration.
The control system for the nutrient solution was completed, with 4 peristaltic pumps wired in and programmed to “dose” the solution, based on measurements from the above sensors, to keep the EC and pH within the optimal range for the plants. At the moment I am keeping the EC at between 1.5 and 1.8, and the pH between 5.5 and 6.0
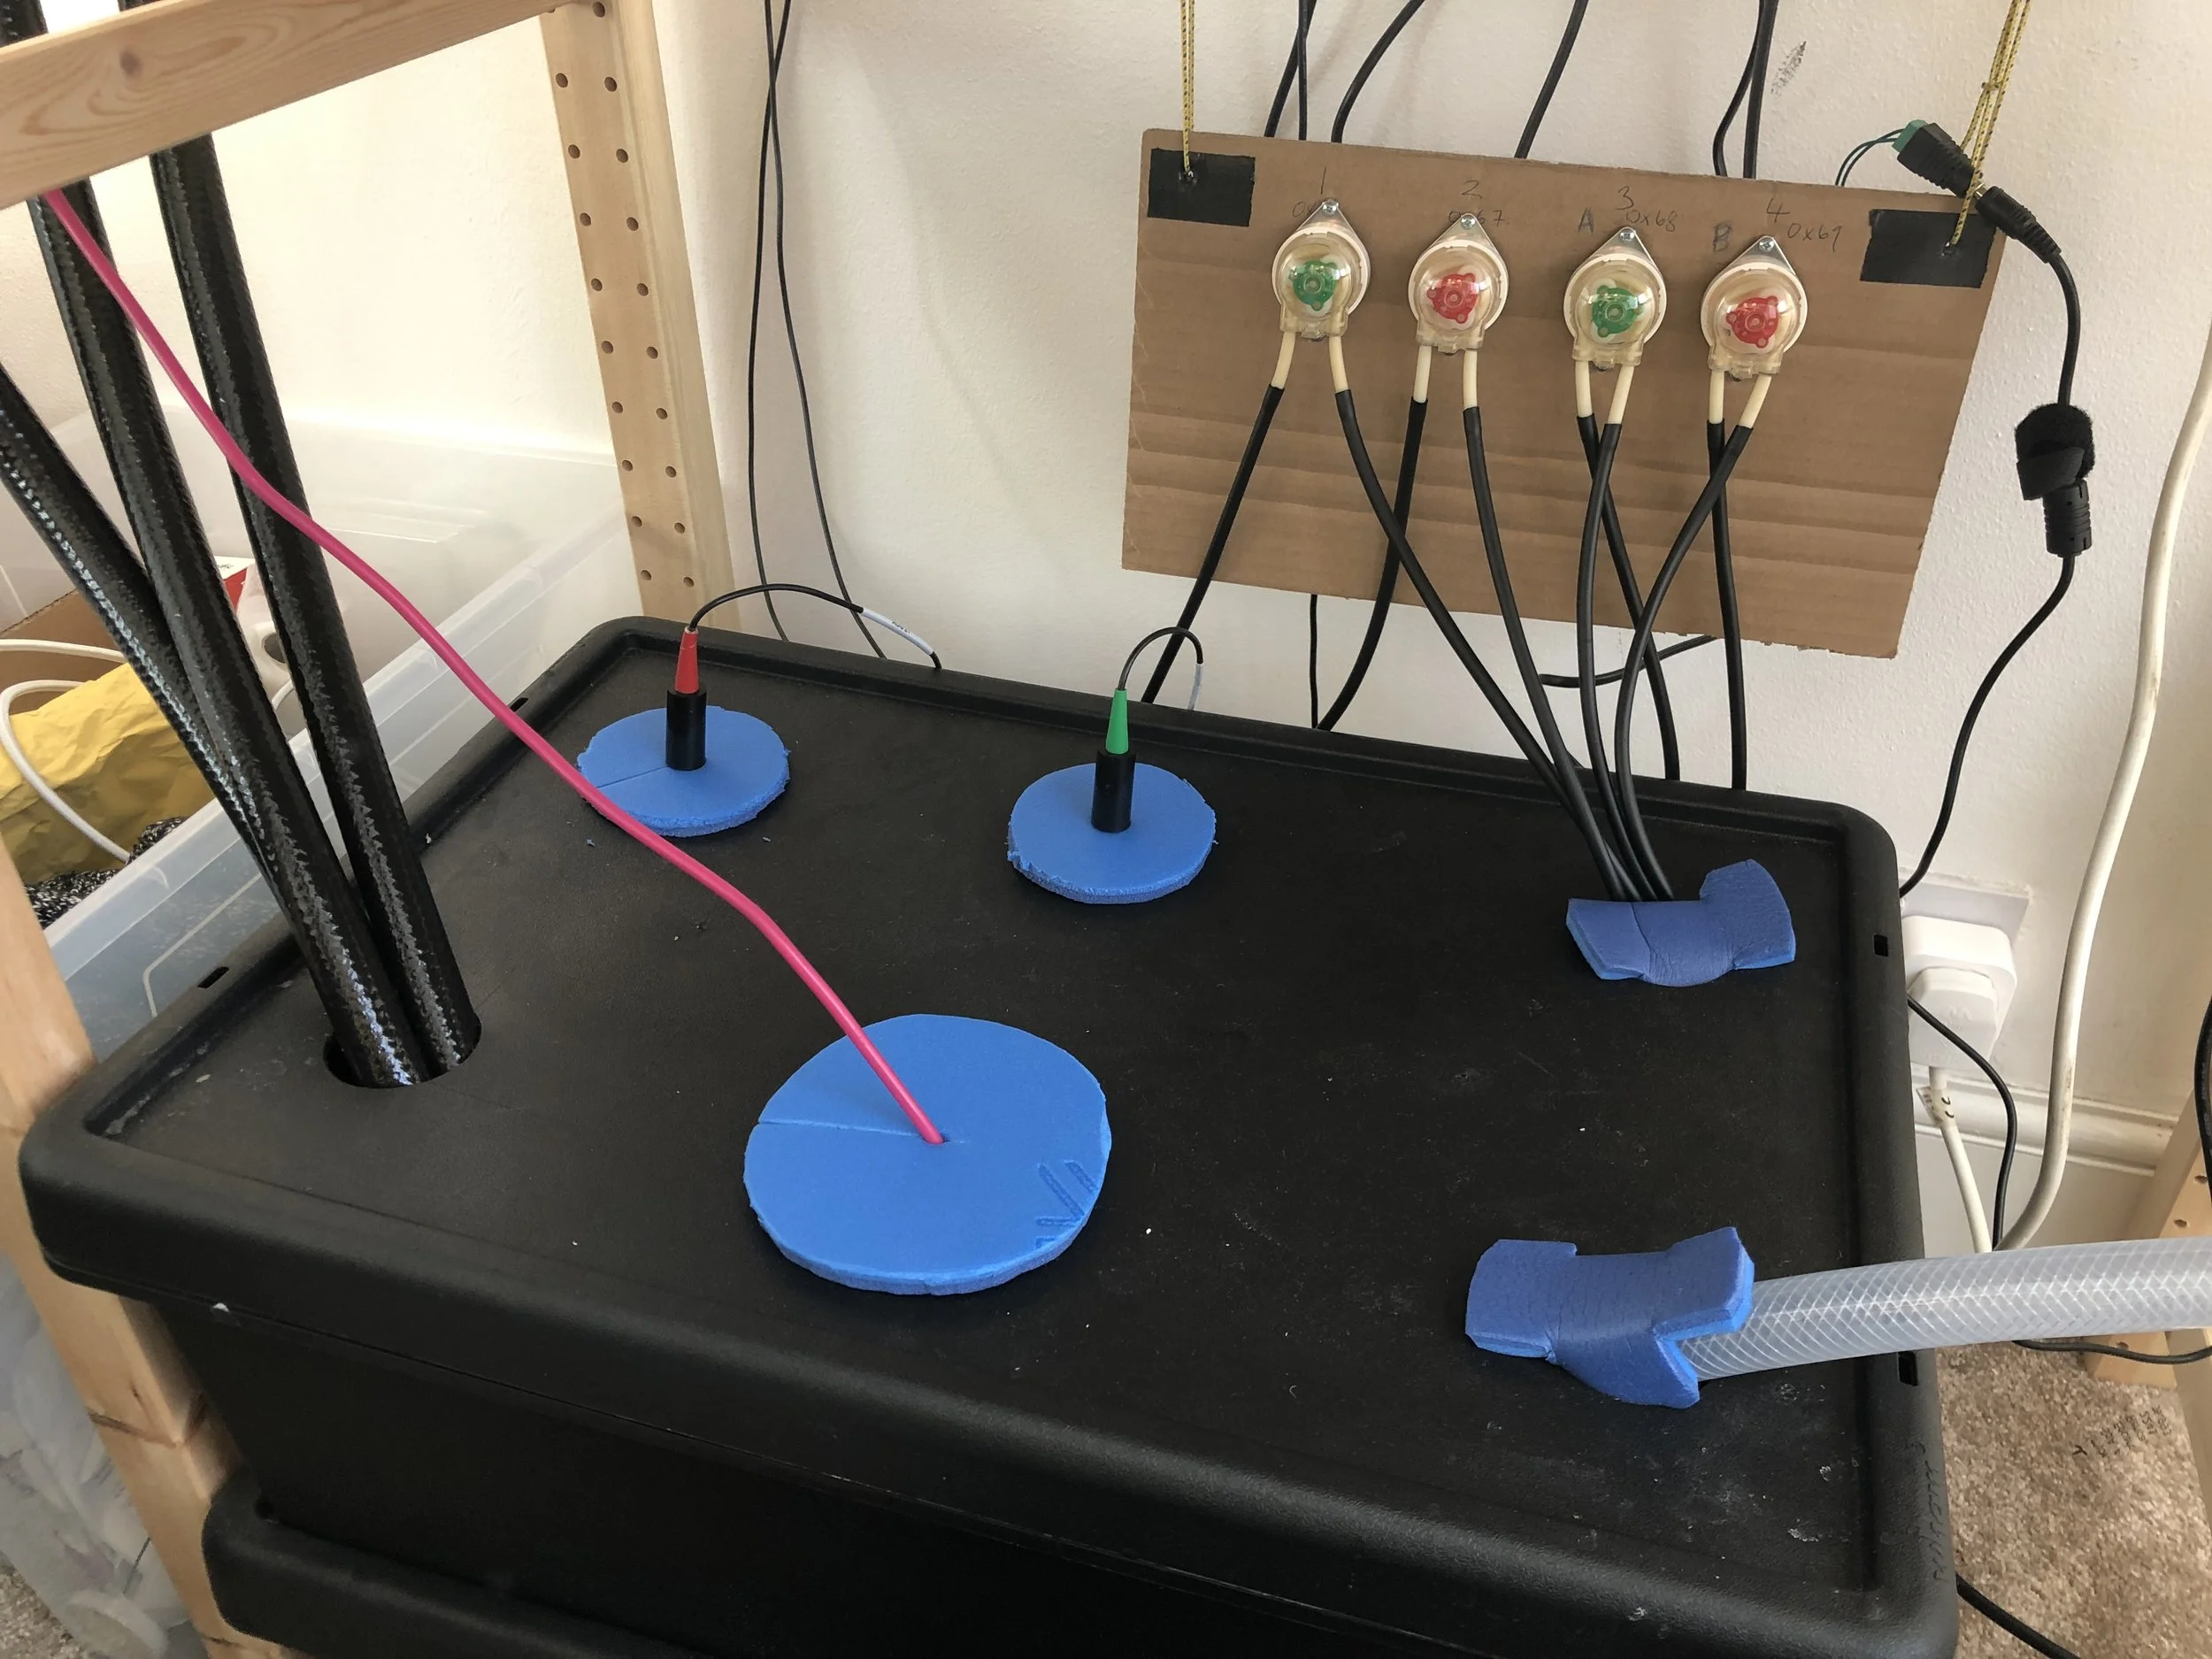
Nutrient reservoir, with sensors and dosing pumps
The image above shows the black nutrient solution reservoir. The transparent PVC hose to the right is the output from the pump to the 3 NFT channels, and the 3 black hoses re-entering the reservoir at the left are the returns from the channels. The red wire in the centre is to the temperature probe. The black sensor with red top at the back is the pH sensor (Atlas Scientific), the green topped sensor is for EC (also Atlas Scientific), and the small black tubes in the top right enter the reservoir from the 4 peristaltic pumps to add nutrients and to raise and lower the pH as necessary.

The whole system
Early results are pretty encouraging. I am using the 200W lights below full power to see if I can get good results without using enormous amounts of energy. Ultimately the point of the whole experiment is to find out the actual costs (energy, time, funds) that are required for the actual yields (high quality culinary plants), and to decide if this is an eco-friendly option to pursue at a larger scale.
The basil and coriander are both growing vigorously and have very healthy looking white roots. There are a many questions that I want to answer, a few of which are:
Why do my basil plants tend to produce very large leaves that become fairly tough and waxy after the initial few weeks?
How long will the system run before I need to replace the nutrient solution and clean the whole system?
How can i make sure that algae and microbial / fungal pests don’t cause problems in the future?
Can I grow enough coriander and basil to make it worthwhile for regular cooking?
What other plants can I successfully grow in the system?
How much electrical energy is required per plant to grow to maturity?
There are many other aspects of the build that I have not even started to cover, such as the raspberry pi and how I have wired up the sensors. Also the use of Kyle Gabriel’s Mycodo software to manage the inputs, outputs, and control aspects of the system and interface everything to a web browser. I’ll cover these in future posts.
The "System"
I am a few weeks into my build of an automated hydroponic system, directly inspired by and trying to emulate the system designed by Kyle Gabriel and featured in this YouTube video
Once the system is complete or nearly complete I will add a more in -depth post on each component of it.
Some of the main challenges I need to face to get this done:
I have not worked much with the Raspberry Pi before, particularly not wiring up multiple sensors, outputs, and control circuitry and interfacing it with the Pi
I am in the UK so I have to source every component in the UK, which can be tricky and sometimes more expensive
I need to figure out how to do it as cheaply as possible, without skimping on things like sensors which need to be high quality
Making sure the “plumbing” is high quality and will not leak - I have to be able to leave this system for several days a time, perhaps longer.
Figuring out how to build a website to display all the “vital signs” and images in real time from the system, whilst also letting me log in and control it remotely.
Another thing which I would like to do is to make some improvements on Kyle’s version, in particular in the following areas:
Making it more aesthetically pleasing, so that it could be an attractive feature in a main room in a flat - in short, make it to be seen.
Make it more eco-friendly. Investigate materials which may be used instead of PVC and other plastics for some of the components. Can bamboo be used for the channels? How can I reduce the overall energy consumption of the project?
Overall I want the system to be able to supply me with all the leafy greens and herbs that I use in my cooking and salads. I want it to have a lesser impact on the environment that buying the same things in the shops, and to be as good or better as what is readily available. I would also like to be able to make a modular system that, once working well, can be scaled up in a straightforward manner, with much reduced cost with respect to the initial system.
Experiment
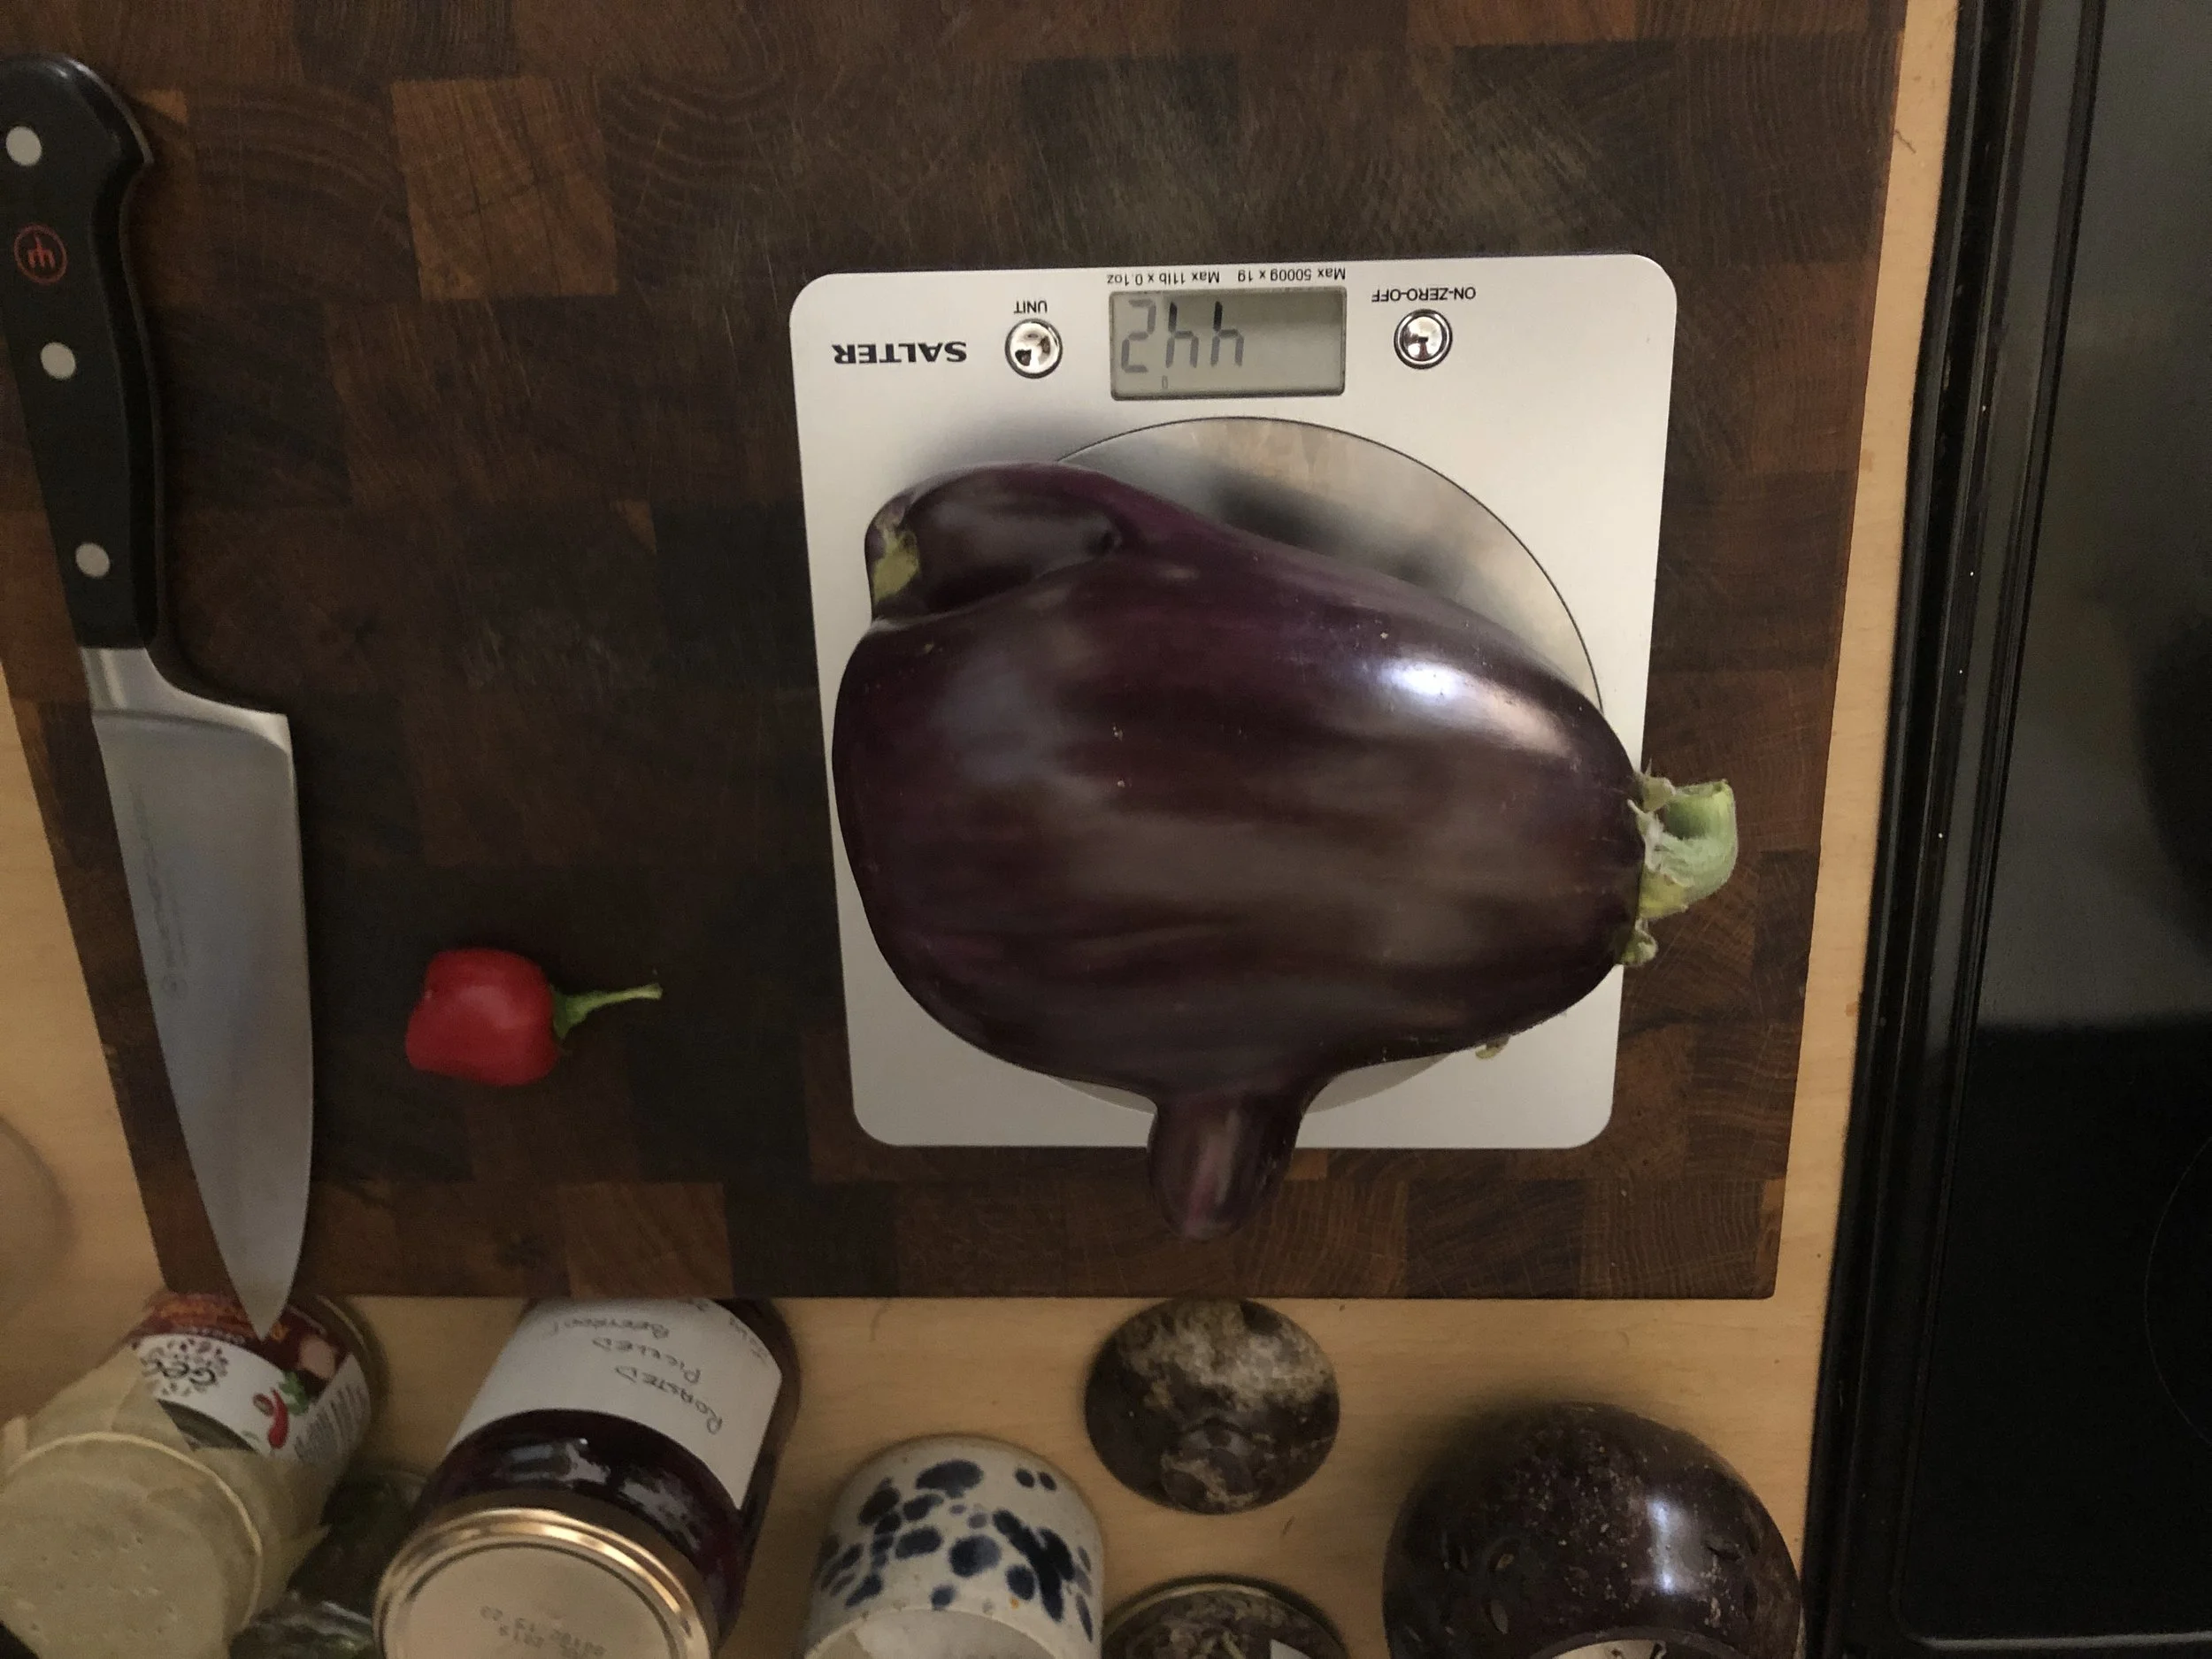
In the last few months I have become interested in growing plants indoors without soil. Whilst the culture is seemingly primed to associate the word “hydroponic” with illicit cultivation of cannabis (the Japanese must have a word for the phenomenon of an idea eliciting basically the same initial response from just about everyone to whom it is mentioned…), I have little to no interest in that species. My initial goal is to be able to grow a steady supply of culinary herbs and leafy greens. Then to investigate the feasibility of growing more “advanced” fruits and vegetables such as strawberries, peppers, aubergines, and tomatoes.
I was initially inspired by watching a series of YouTube videos, particularly https://www.youtube.com/watch?v=nyqykZK2Ev4 and https://www.youtube.com/watch?v=bWebs3ID6Hw
These are very different styles. The Simple Greens one appealed to my sense of simplicity and compactness. The Kyle Gabriel project is just mind-boggling in it’s complexity and the accomplishment of the maker - not only does Kyle build the whole system with it’s advanced monitoring and adjustment capability, but he also wrote the open source software that he uses (Mycodo), and (I think) also the music, as well as producing a high quality video document and a superb project writeup at https://kylegabriel.com/projects/2020/06/automated-hydroponic-system-build.html
For my first foray, I did some basic research and bought an off-the-shelf NFT (nutrient film technique) system to try it out. I started growing lettuce in that system and it went very well.
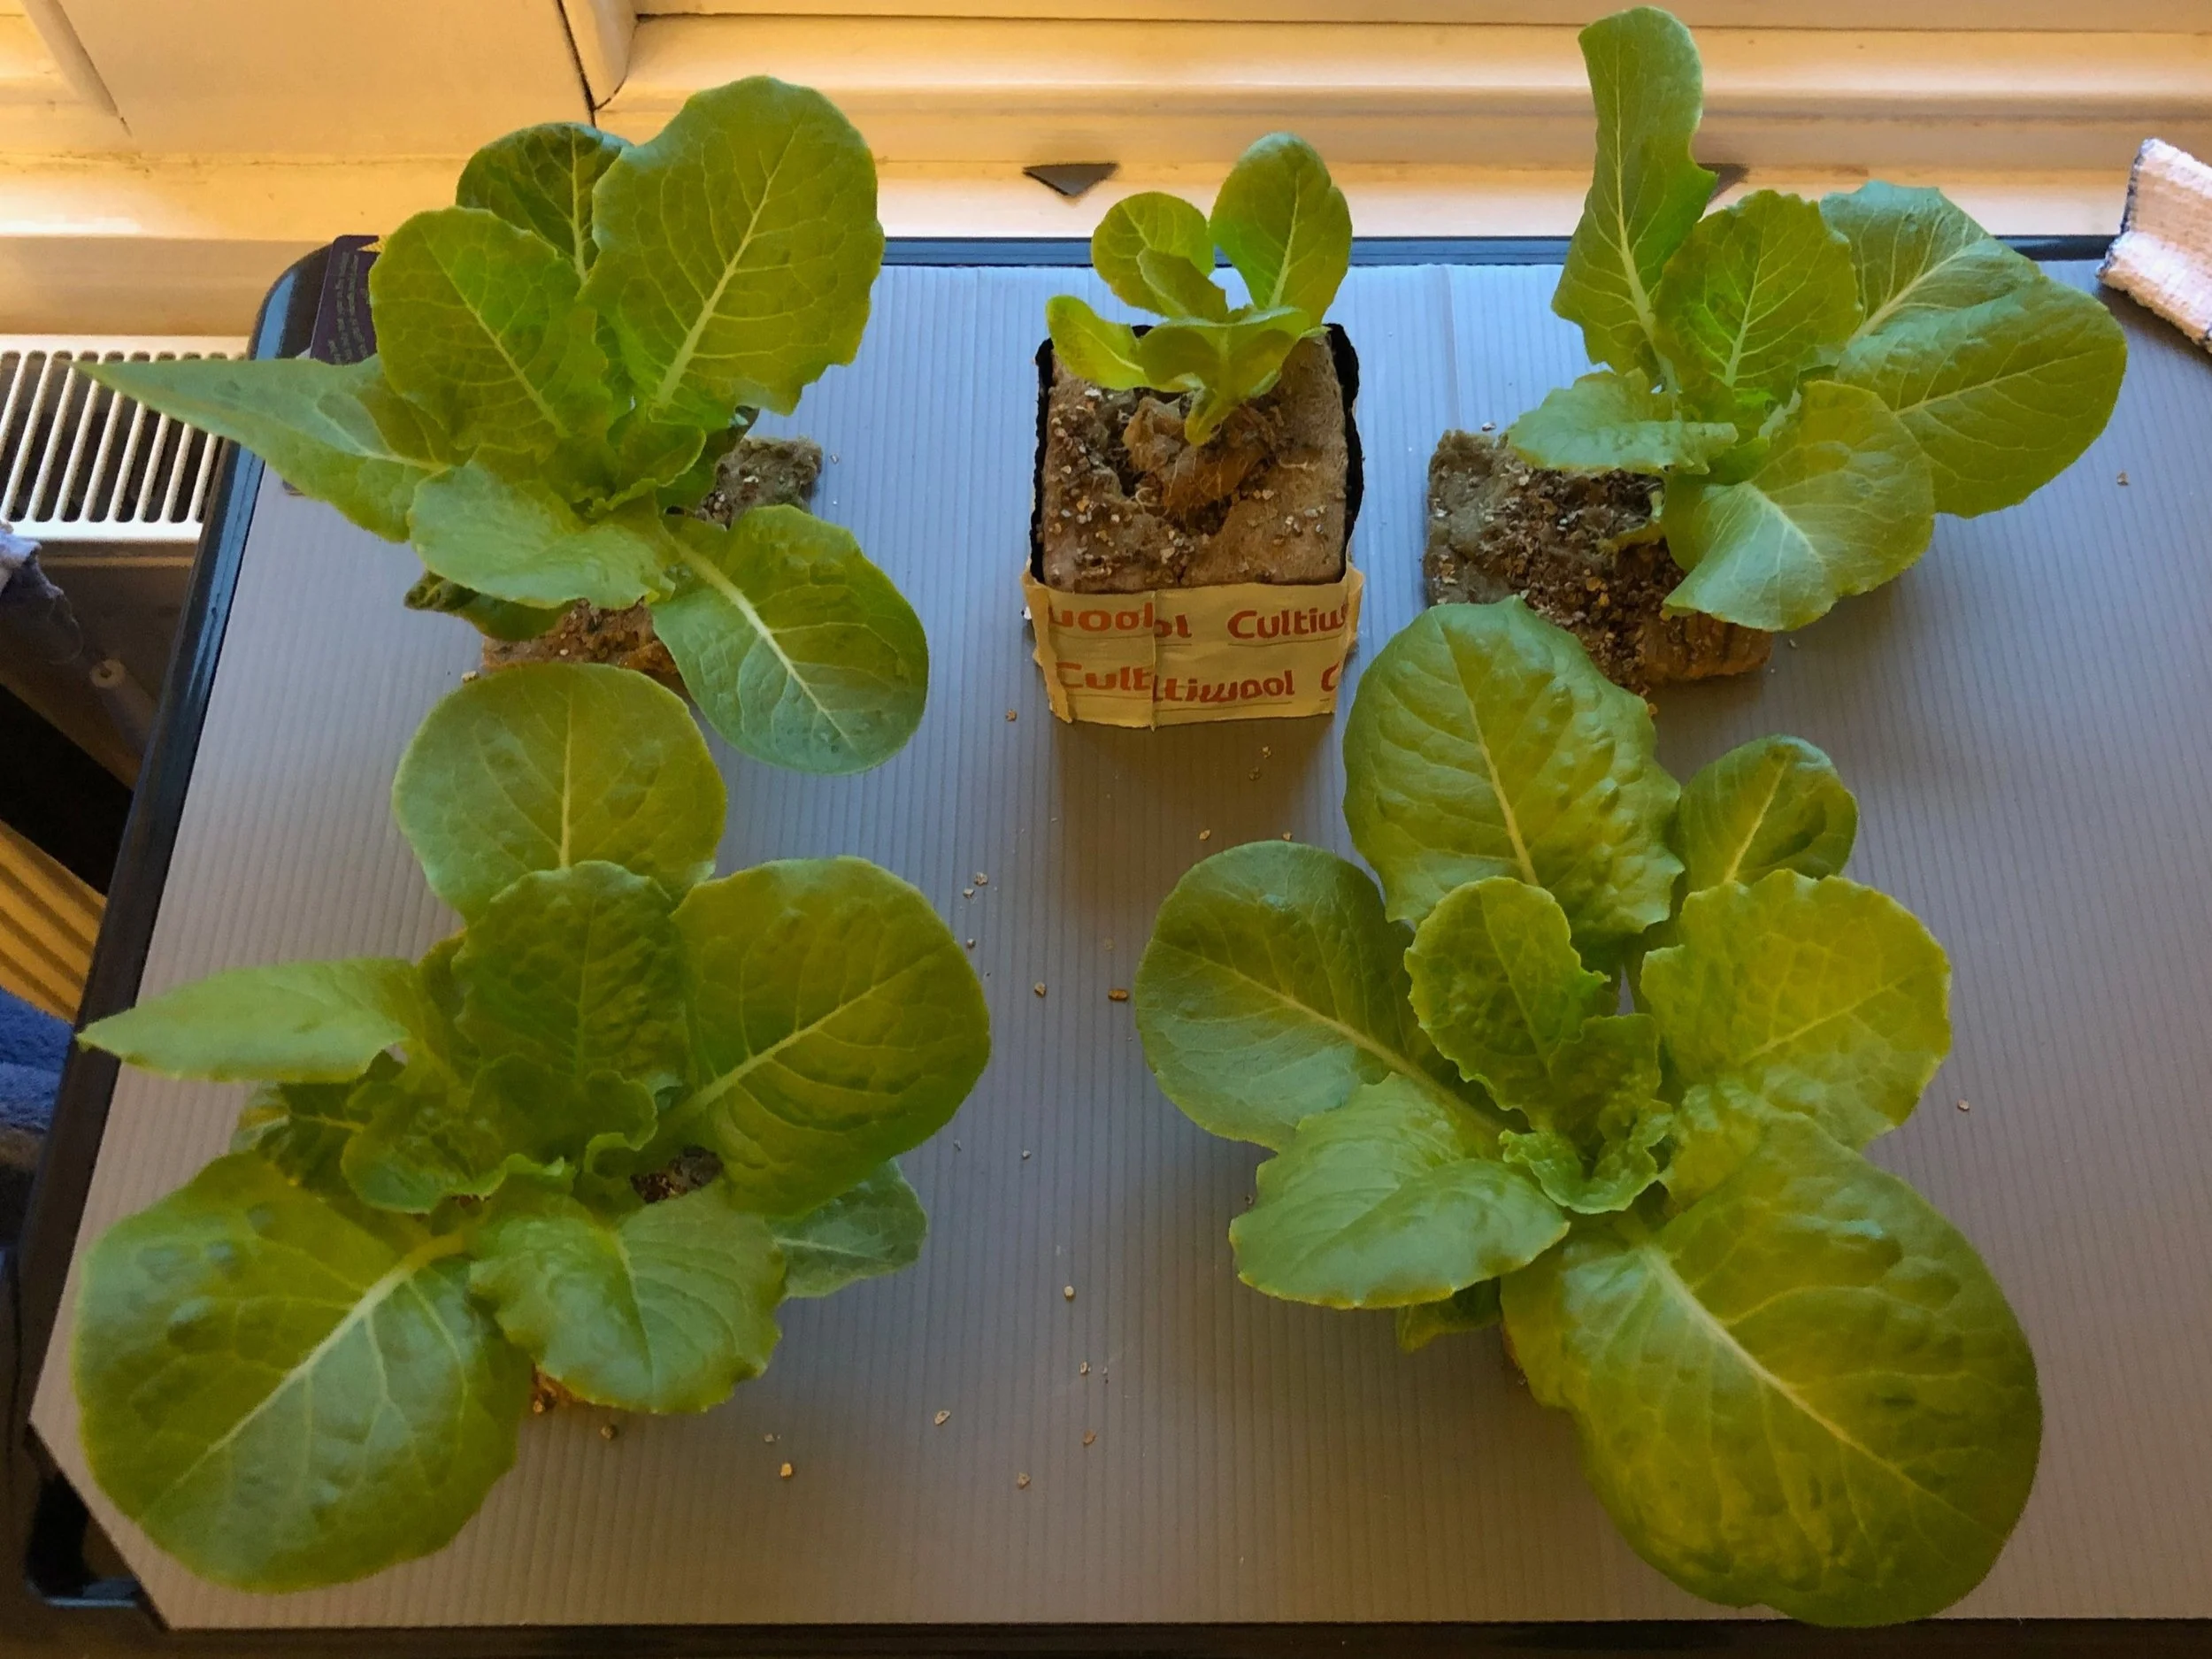
The first test, growing lettuce in rockwool plugs, then fitting those plugs into rockwool cubes. For this first test I was using just sunlight coming in the windows of the flat, which was plentiful at the back end of the past summer

The same system transplanted to a cupboard, growing using an LED light
Then, in preparation for the winter, I tested the same system in a cupboard, using timer-controlled LED growlights. This also worked really well, with no problems for the lettuce. As you can see I was starting to bring on some herbs from seed, and these gave mixed results.
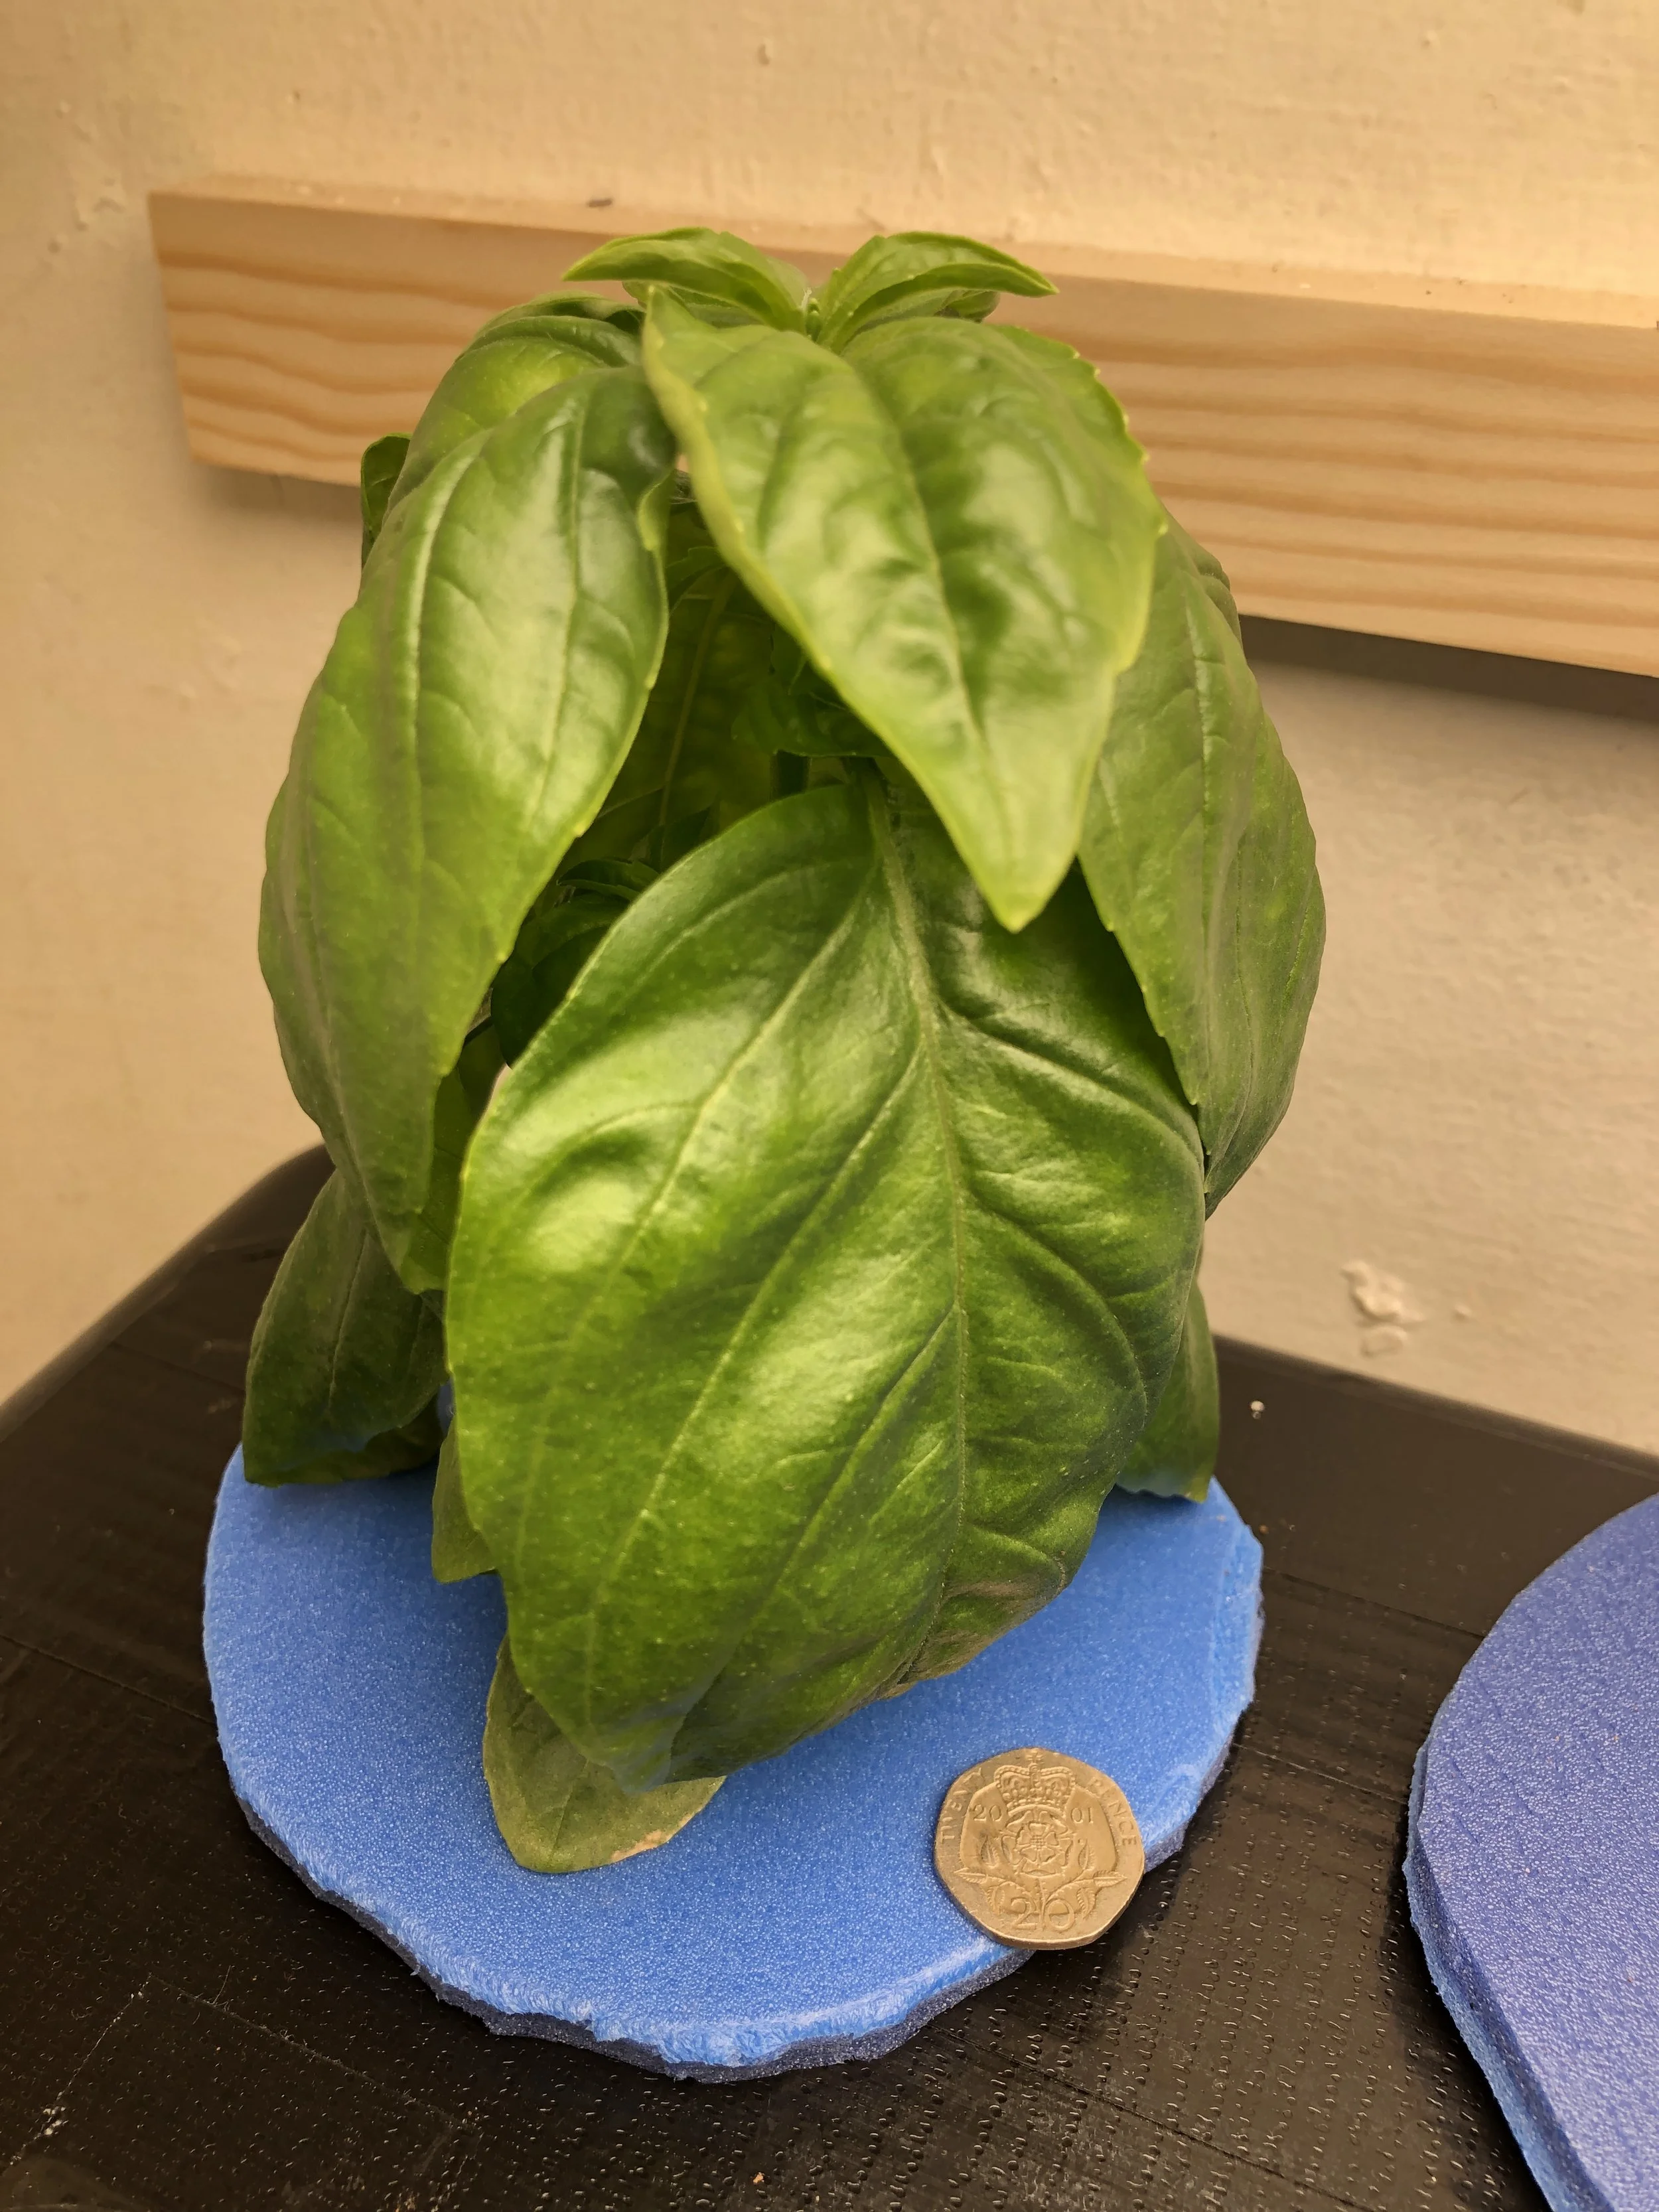
(Very) large leaved basil plant
Basil is one of those herbs which seems to grow really well in this system. However, other herbs I tried, like coriander, dill, and tarragon did not enjoy the conditions so much. They will need to be more carefully managed.
I was initially please with the lettuce and basil results, but the other herbs were not working very well. This was likely due to the fact that my monitoring of the key aspects of the nutrient solution (its pH and electrical conductivity i.e. concentration of plant nutrient), which then tended to waver outside of the ideal windows for each plant. Some plants are more susceptible to this than others, and I am just at the beginning of finding out about this.
All this preamble brings me on to the next stage - to work from the project blog above from Kyle Gabriel, and to recreate my own version of his tech-heavy system to bring in some of my own skills as well as promising a far less labour intensive and much more accurately maintained environment in which to experiment with growing different types of plants. Future posts on this blog will therefore be covering my attempts to do that, and to learn what i need to fill in my own knowledge gaps in order to make it work…